Web interface
The XiVO Centralized User Management (XCU) is managed through a web interface. In the following sections, we will highlight the main features of the system.
Definitions
XCU uses a few concepts that are important to understand in order to use the interface correctly.
- XiVO
- The XiVOs servers that are managed by XCU. XCU will automatically retrieve the entities and the users from them and apply the configuration to them.
- Entity
- Entities, also called Contexts, are the parts of the dialplan. Users are attached to them.
- Line template
- Line templates are used to quickly create users : they define a few default options (ringing time, voice mail, etc.) that will be applied to the new user. A line template is required to create a user.
- User
- Actual users that are associated with a phone number
- Administrators
- Users that are able to connect to the XCU and manage the XiVOs.
Dashboard

The dashboard provides you some insights about your XiVO systems.
The left sidebar, displayed in every page of the application, gives you access to the various actions you can perform. The list of the configured XiVOs and their entities is shown to give a quick access to the one you want to manage.
XiVO
Create XiVO

This page allows you to add a new XiVO that will be managed by XCU.
Warning
Before adding XiVO, please make sure it fulfills requirements - see XiVO(s) Requirements & Limitations.
The first step is to add the displayed SSH key to the authorized keys of your XiVO server. This will allow XCU to connect and configure the XiVO server. You could do this kind of command :
echo 'ssh-rsa TheVeryLongSSHKeyYouCopied toto@someserver' | ssh root@xivoIp 'cat >> .ssh/authorized_keys'
Then, you have to provide the following informations :
- Name : name of the XiVO server that will be displayed in XCU
- Hostname : hostname or IP address of the XiVO server
You then have two options :
- Create the XiVO and configure it now : XCU will save the information, try to connect to the XiVO server and perform the configuration. XiVO services will be unavailable during the operation.
Warning
The configuration takes a while. Relax, go drink a coffee, XCU is doing the legwork for you :)
Note
If you want Xivo to be configured for centralized routing between multiple Xivos, please follow steps described in Configuration of Xivos for Centralized Routing.
- Create the XiVO without configuring it : XCU will only save the informations.
View XiVO
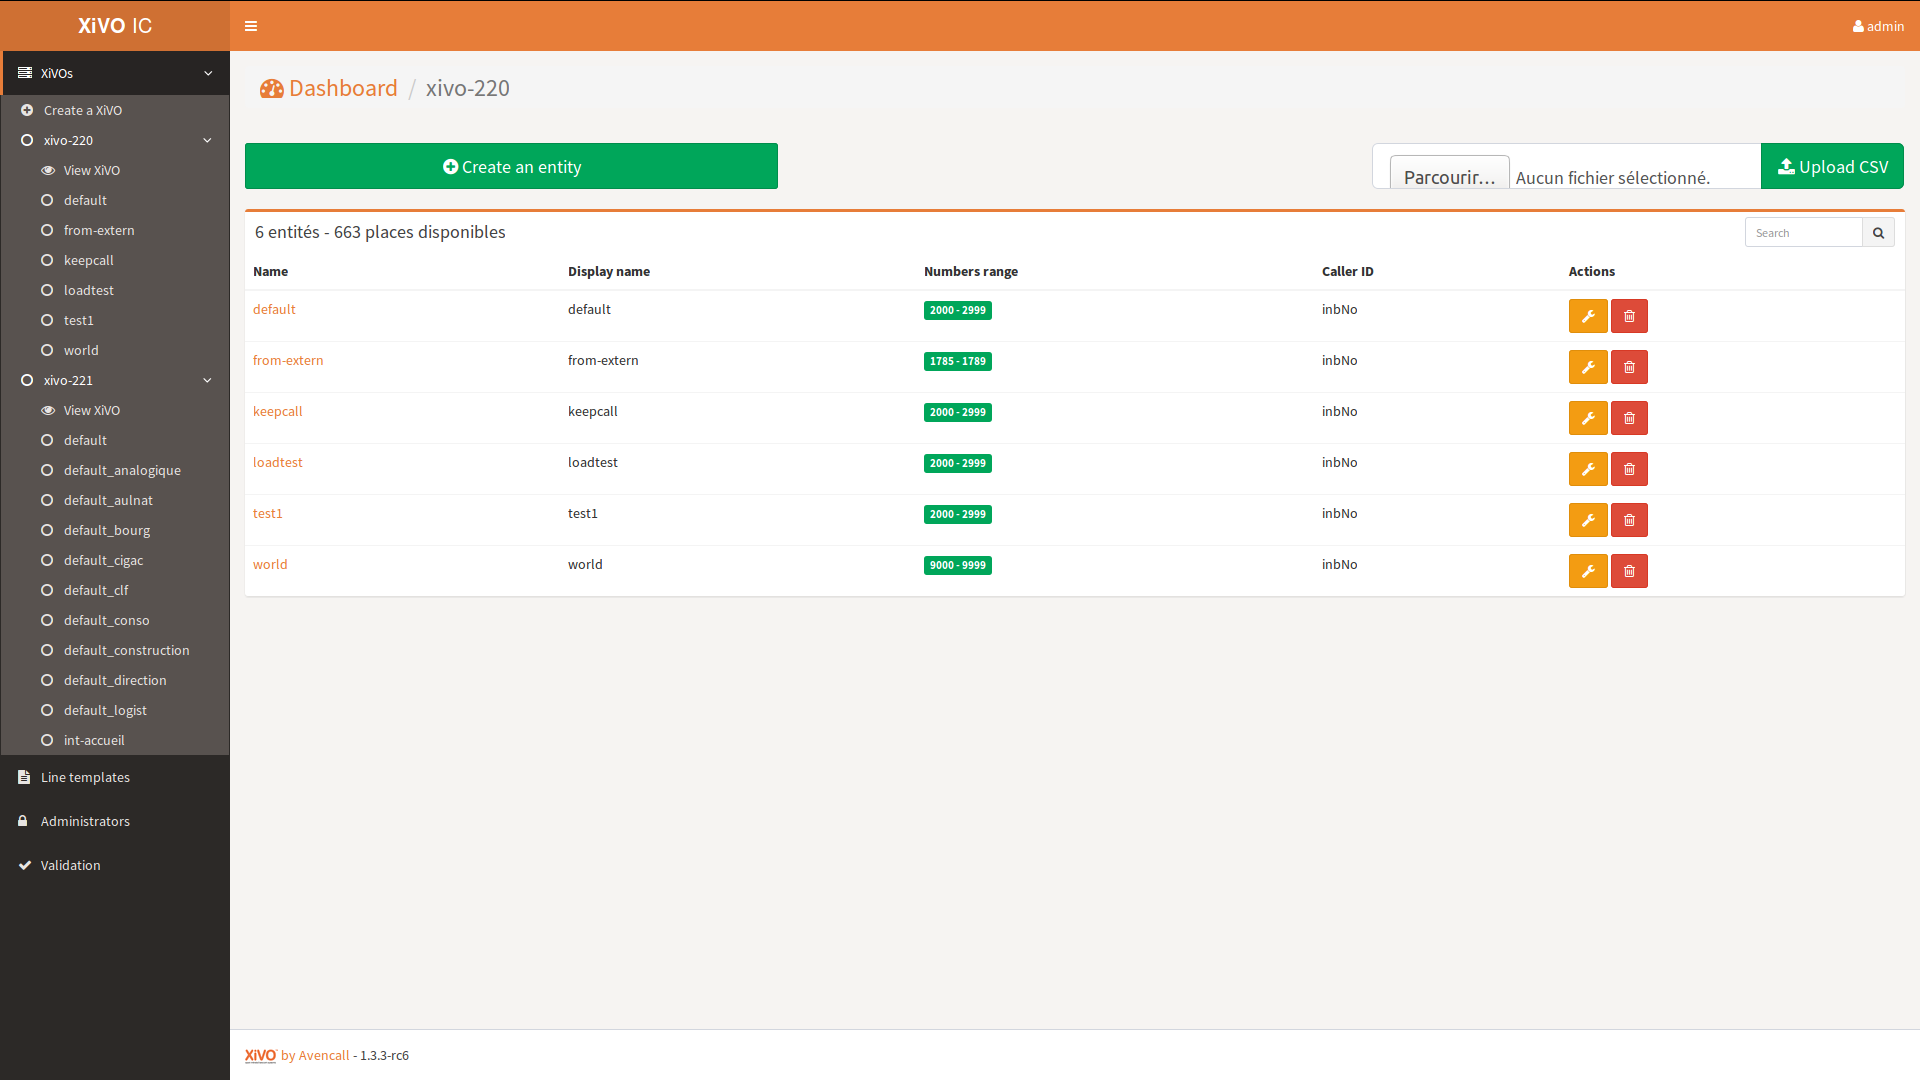
On the sidebar, each XiVO has its own View XiVO link. This page allows you to :
- Add a new entity to this XiVO by clicking on the green button
- See the entities associated to this XiVO and perform some operations to them :
- Edit one by clicking on the yellow button with the wrench icon
- Delete one by clicking on the red button with the trash icon
Entity
Note
Be sure to check the Interval overlapping configuration option before working with entities.
Create entity

This page allows you to add a new entity to a XiVO. You have to provide the following informations :
Name : name that will be used by the XiVO server
Display name : name that will be displayed on XCU
Caller ID : phone number that will be displayed on outgoing call from this entity
Intervals : ranges of phone numbers that will be available to this entity. For each one, provide :
- Start
- End
- Routing mode (see bellow)
- Direct number prefix (only for interval Routed with direct number)
- First direct number (only for interval Routed with custom direct number)
The system will return an error if the intervals overlap with other entities
Routing mode affects how numbers from given interval are routed via centralized routing:
| Routing mode | centralized routing |
|---|---|
| Routed | Internal number is used for centralized routing |
| Not routed | Numbers are not routed via centralized routing |
| Routed with direct number | Direct number prefix + internal number is used for centralized routing |
| Routed with custom direct number | Users has custom routed numbers in range from First direct number up to the width of the interval |
If you have user in interval Routed with (custom) direct number on XiVO-A and call him from XiVO-B using his long (external) number:
- target user’s long (external) number is translated to short (internal) number by the routing mecanism on the first XiVO (XiVO B in this case)
- on XiVO-A there is an incoming call with short (internal) number of target user
View entity
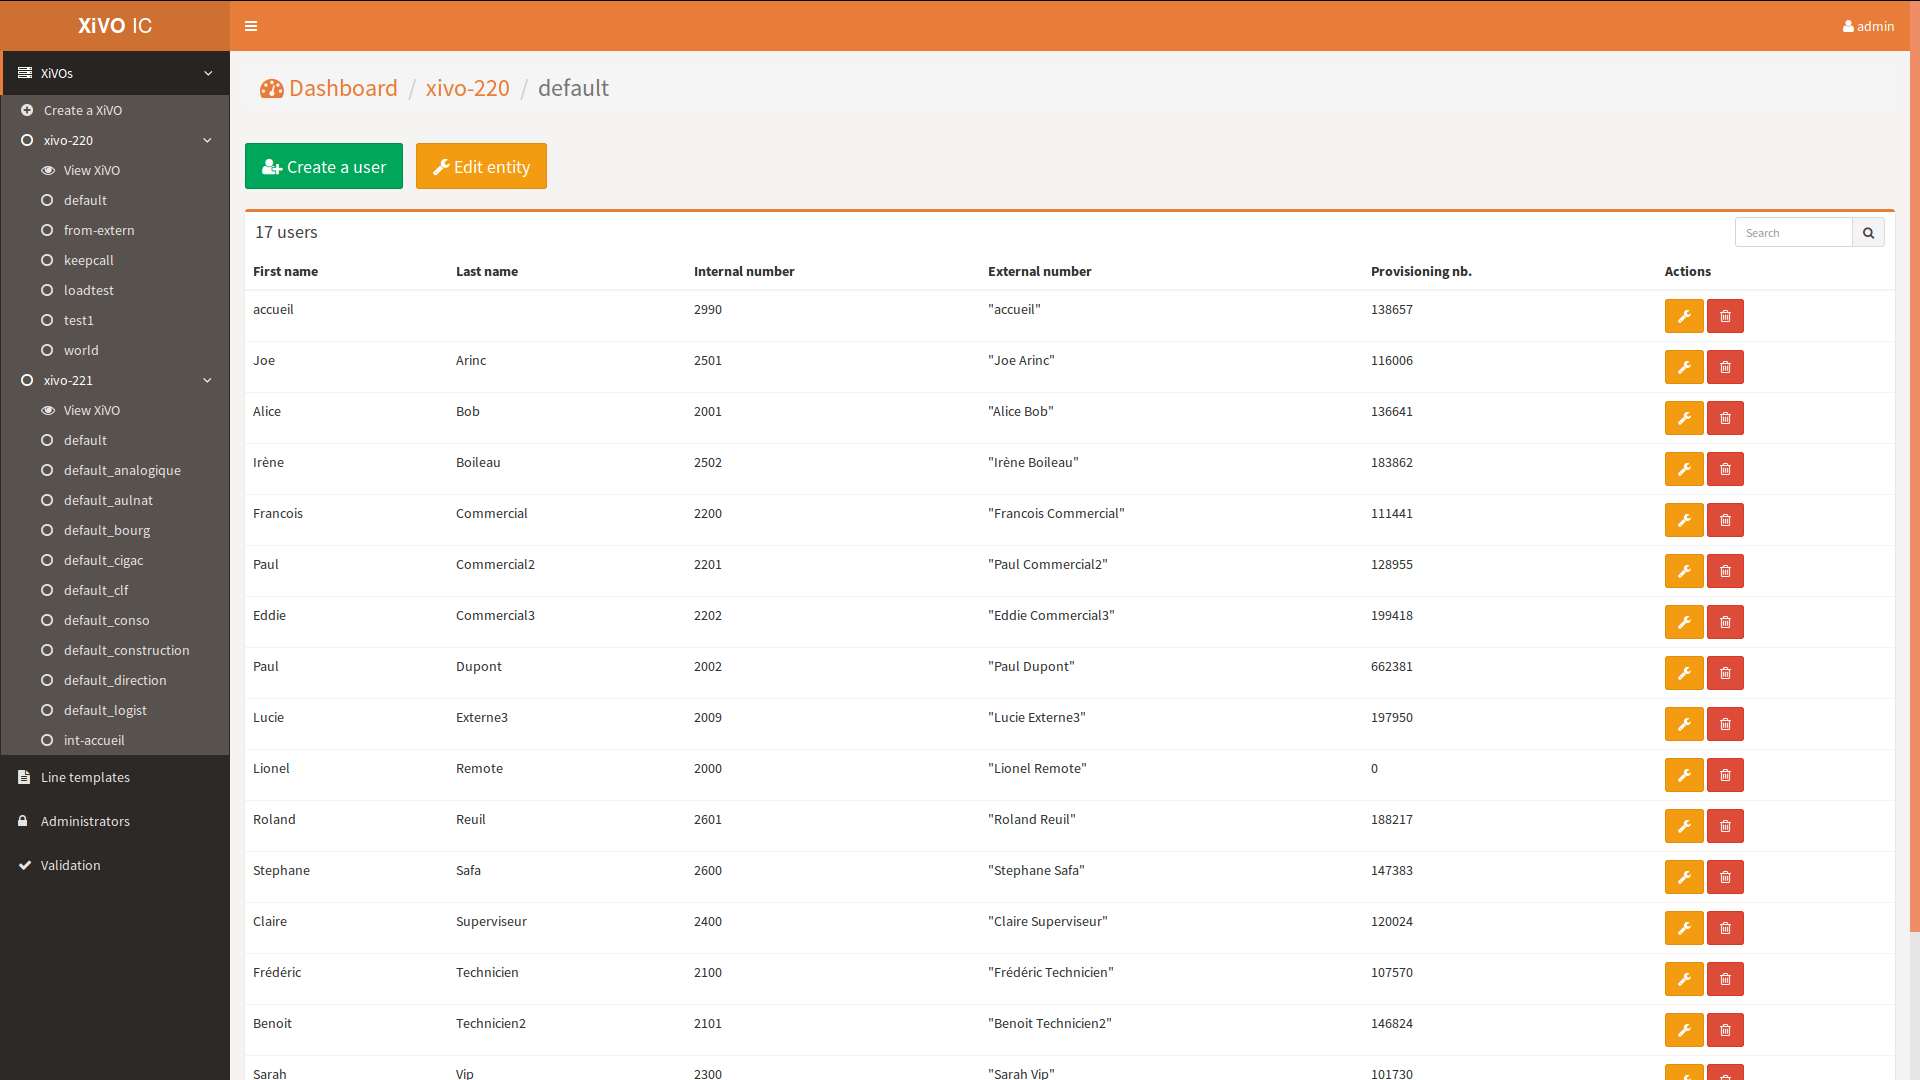
On the sidebar, each entity has its own link. This page allows you to :
- Add a new user to this entity by clicking on the green button
- Edit the entity by clicking on the yellow button with the wrench icon
- See the users associated to this entity and perform some operations to them :
- Edit one by clicking on the yellow button with the wrench icon
- Delete one by clicking on the red button with the trash icon. At first click, the icon turns into a question mark. You have 5 seconds to click again to launch user deletion. This process prevents you from accidentally delete users.
Edit entity
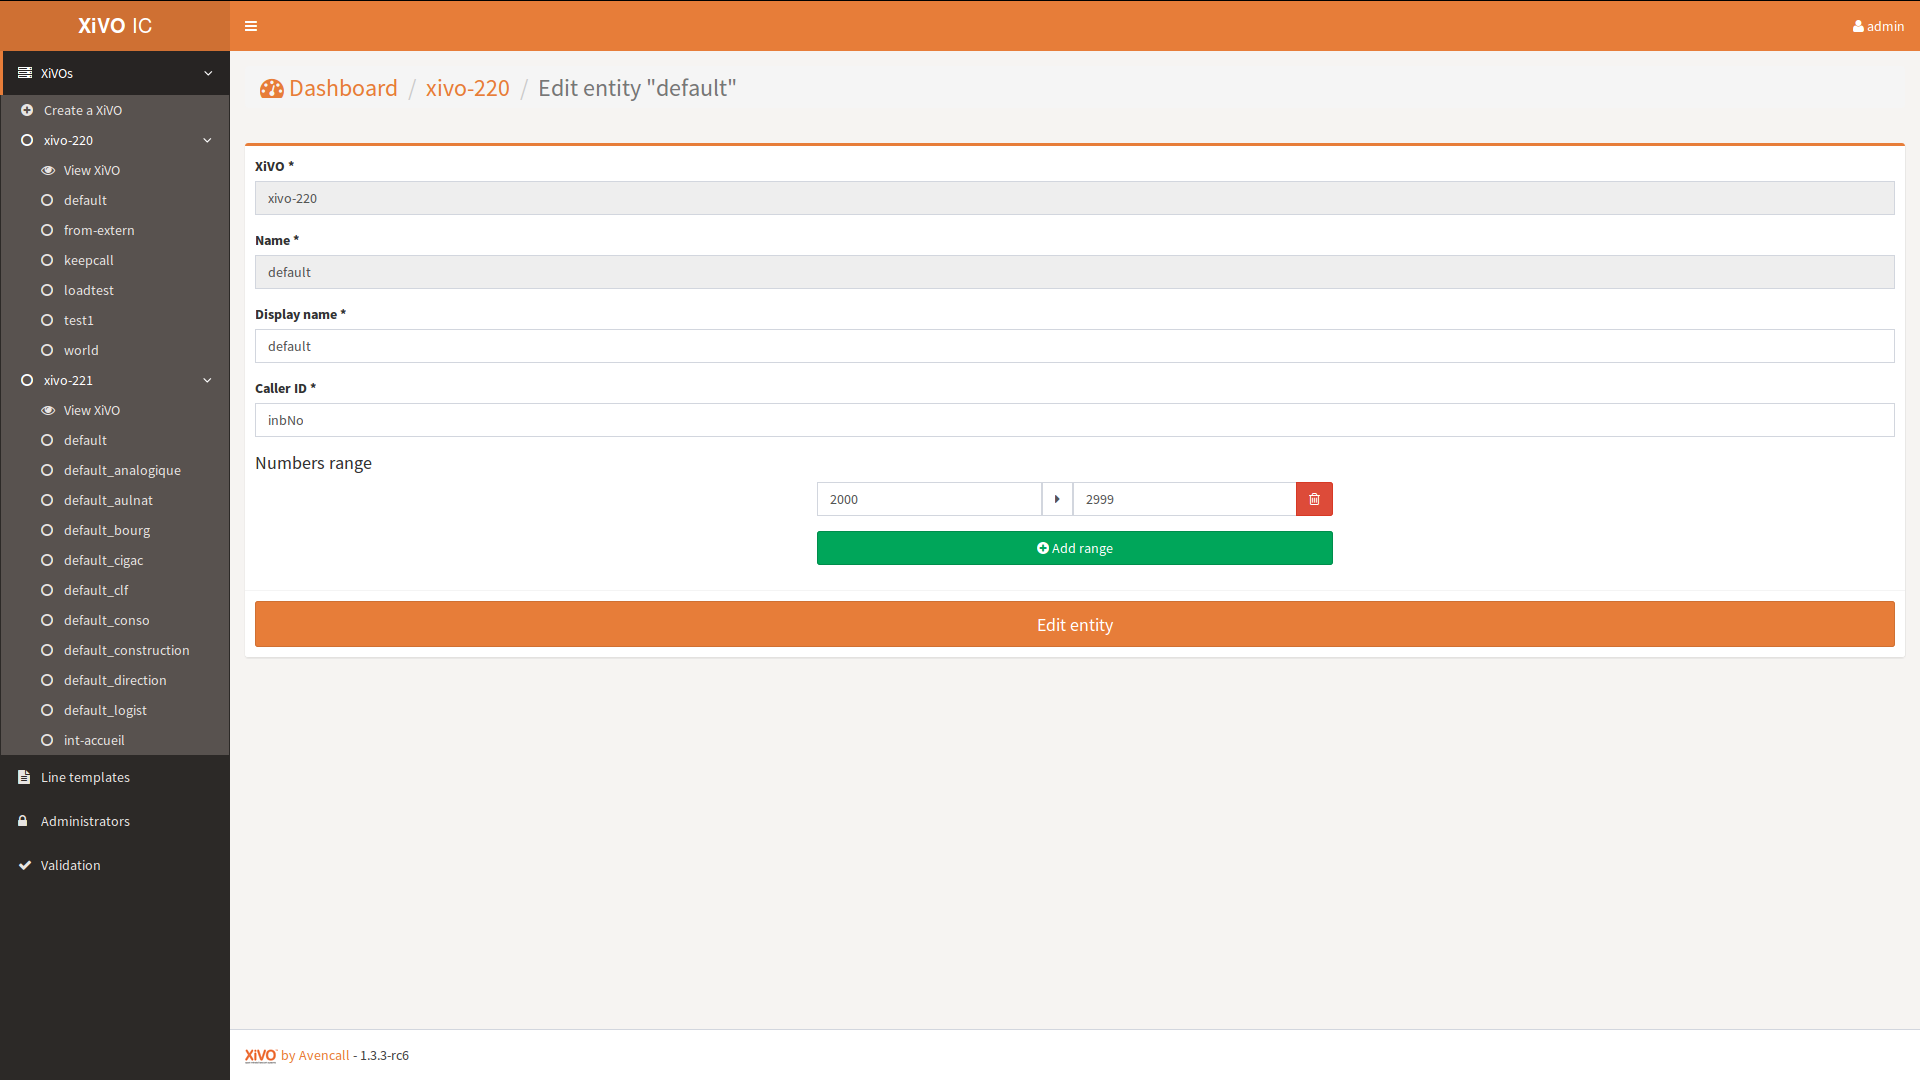
This page allow you to modify an entity. Please refer to the Create entity section for fields details.
Line templates
List templates
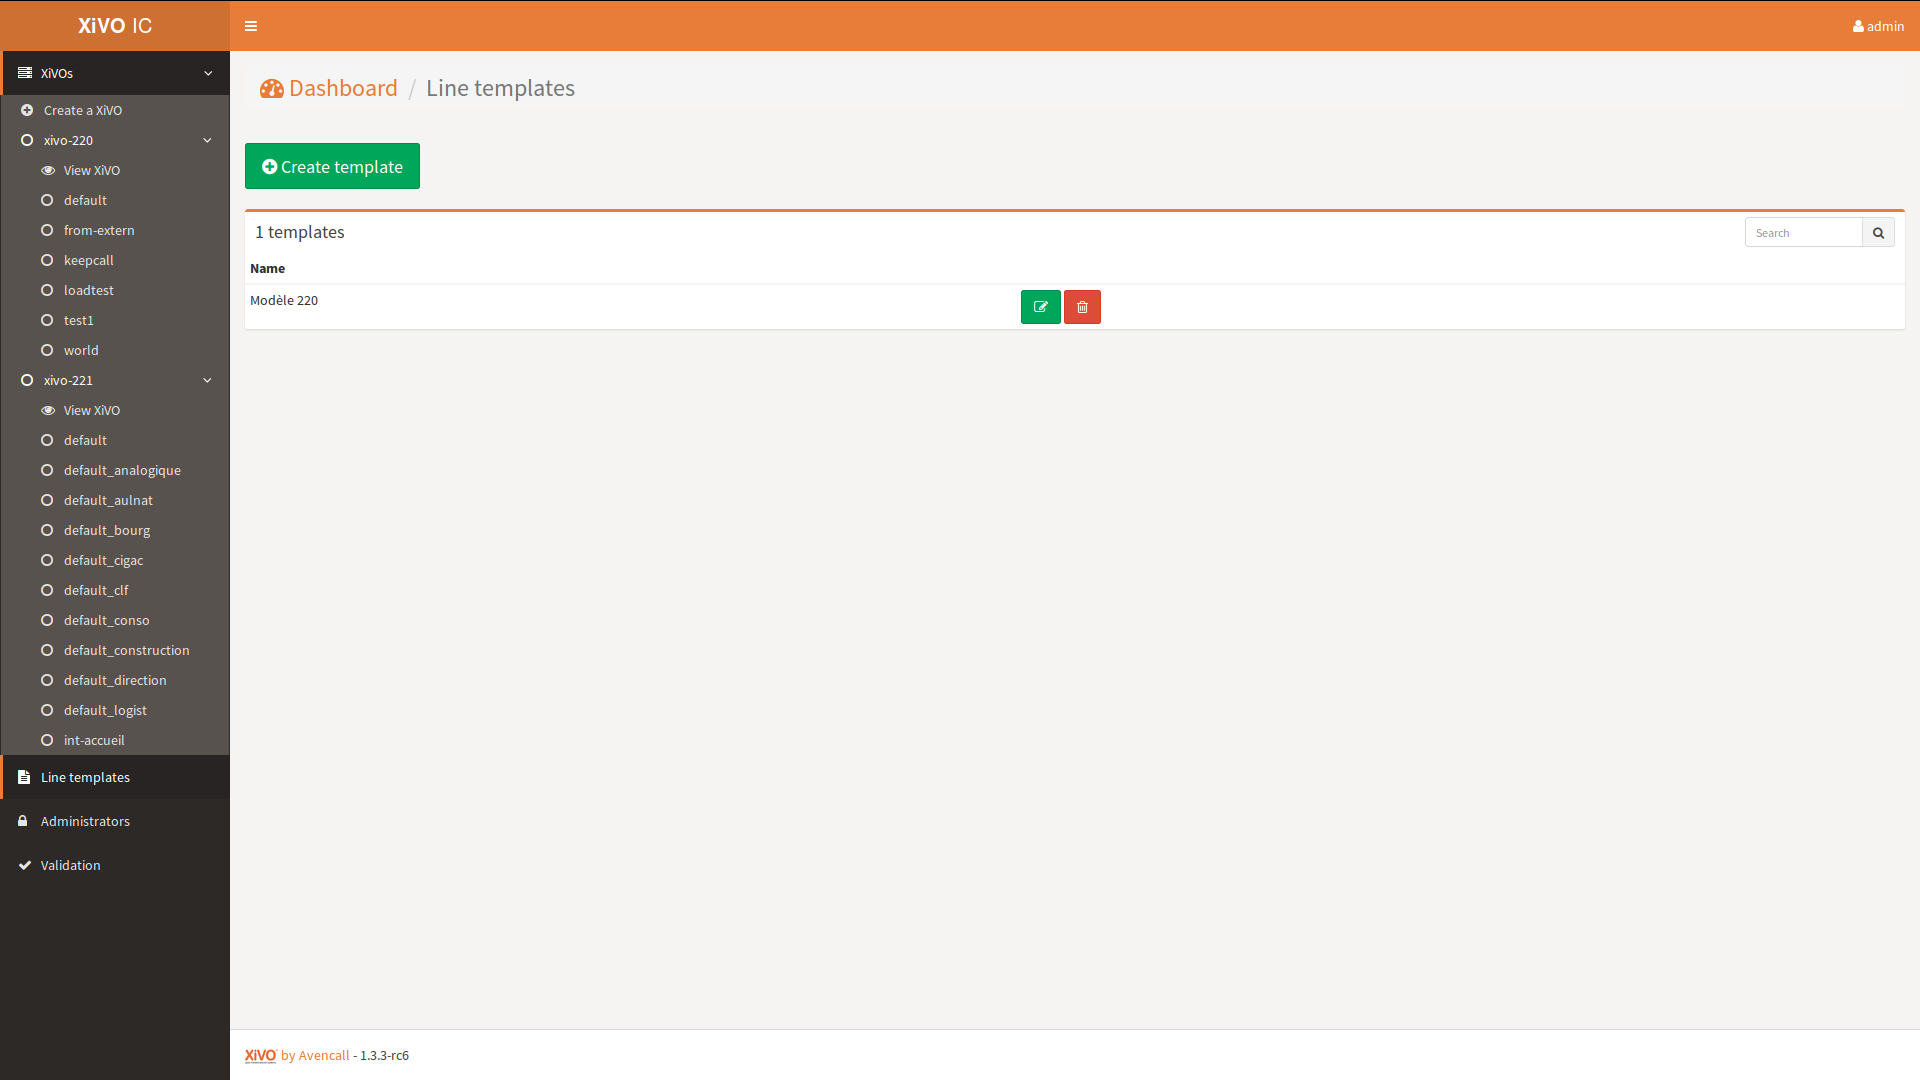
On the sidebar, Line template has its own link. This page allows you to :
- Add a new line template by clicking on the green button
- See all the line templates and perform some operations to them :
- Edit one by clicking on the yellow button with the wrench icon
- Delete one by clicking on the red button with the trash icon
Create template
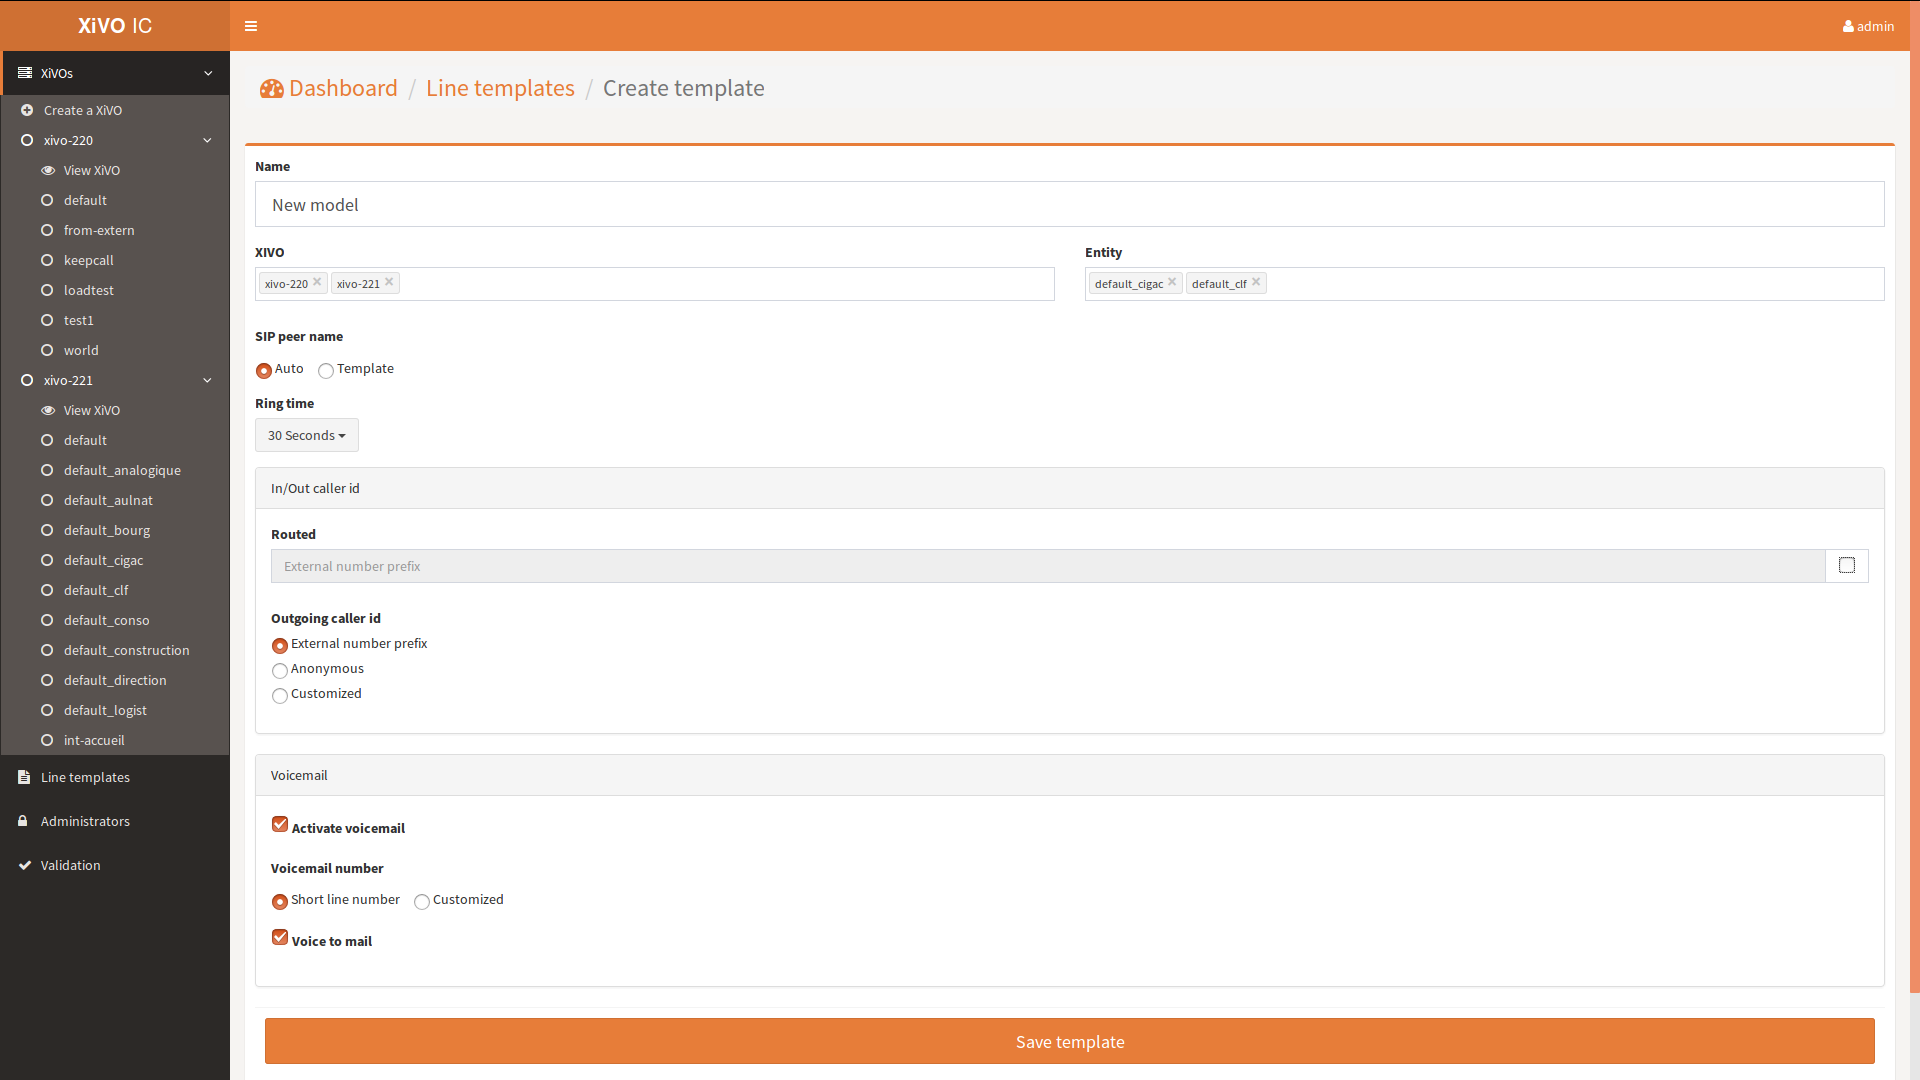
This page allows you to add a new line template. You have to provide the following informations :
Name : name that will be be displayed on XCU
XiVO : select the XiVOs for which this template will be available
Entity : select the entities for which this template will be available. Only entities of the selected XiVOs are displayed
SIP peer name : Auto or Model
Ringing time : number of seconds before incoming call is rejected
Routed :
- The text field allows you to provide the SDA prefix to call the phone
- Uncheck the checkbox if you don’t want the phone to be called from the outside
Outgoing caller id : specify what number is displayed on outgoing call. Possible values are :
- External number prefix
- Anonymous
- Customized : a text field appears to provide the custom number
Voicemail :
Activate voicemail : enable or not the voicemail
Voicemail number : specify what number is used to call the voice mail. Possible values are :
- Short line number : use the default short number
- Customized : a text field appear to provide the custom number
Voice to mail : whether or not to send an email when a new message is left, the email is the user’s email for short line number box and the one configured in the customized voicemail for the customized box, see Create user for details.
Edit template

This page allows you to modify a template. Please refer to the Create template section for fields details.
User
Create user

This page allows you to add a new user to an entity. You have to provide the following information :
- Template : line template to use as a template to create the user. The main options of the template are displayed below
- First name
- Last name
- Internal number : number that will be used to internally call the user. Only the available numbers are displayed
- Email : shown in the directory and used when voice to mail feature is activated
- Voicemail : Optional, activated only if present in the used template
- When a private box is choosen (short line number), the box is created and the user’s email is obligatory when Voice to mail feature is activated.
- When a custom voicemail box is used, the interface will create it if the box doesn’t exist on XiVO, it will be created with user’s email. Otherwise the existing one is used and the email is not changed.
- Currently there’s a limitation due to a XiVO bug - when you update a user with associated custom voicemail, the voicemail name is replaced with the user’s name.
- CTI credentials : provide a login and a password to allow the user to connect through CTI interfaces
Edit user
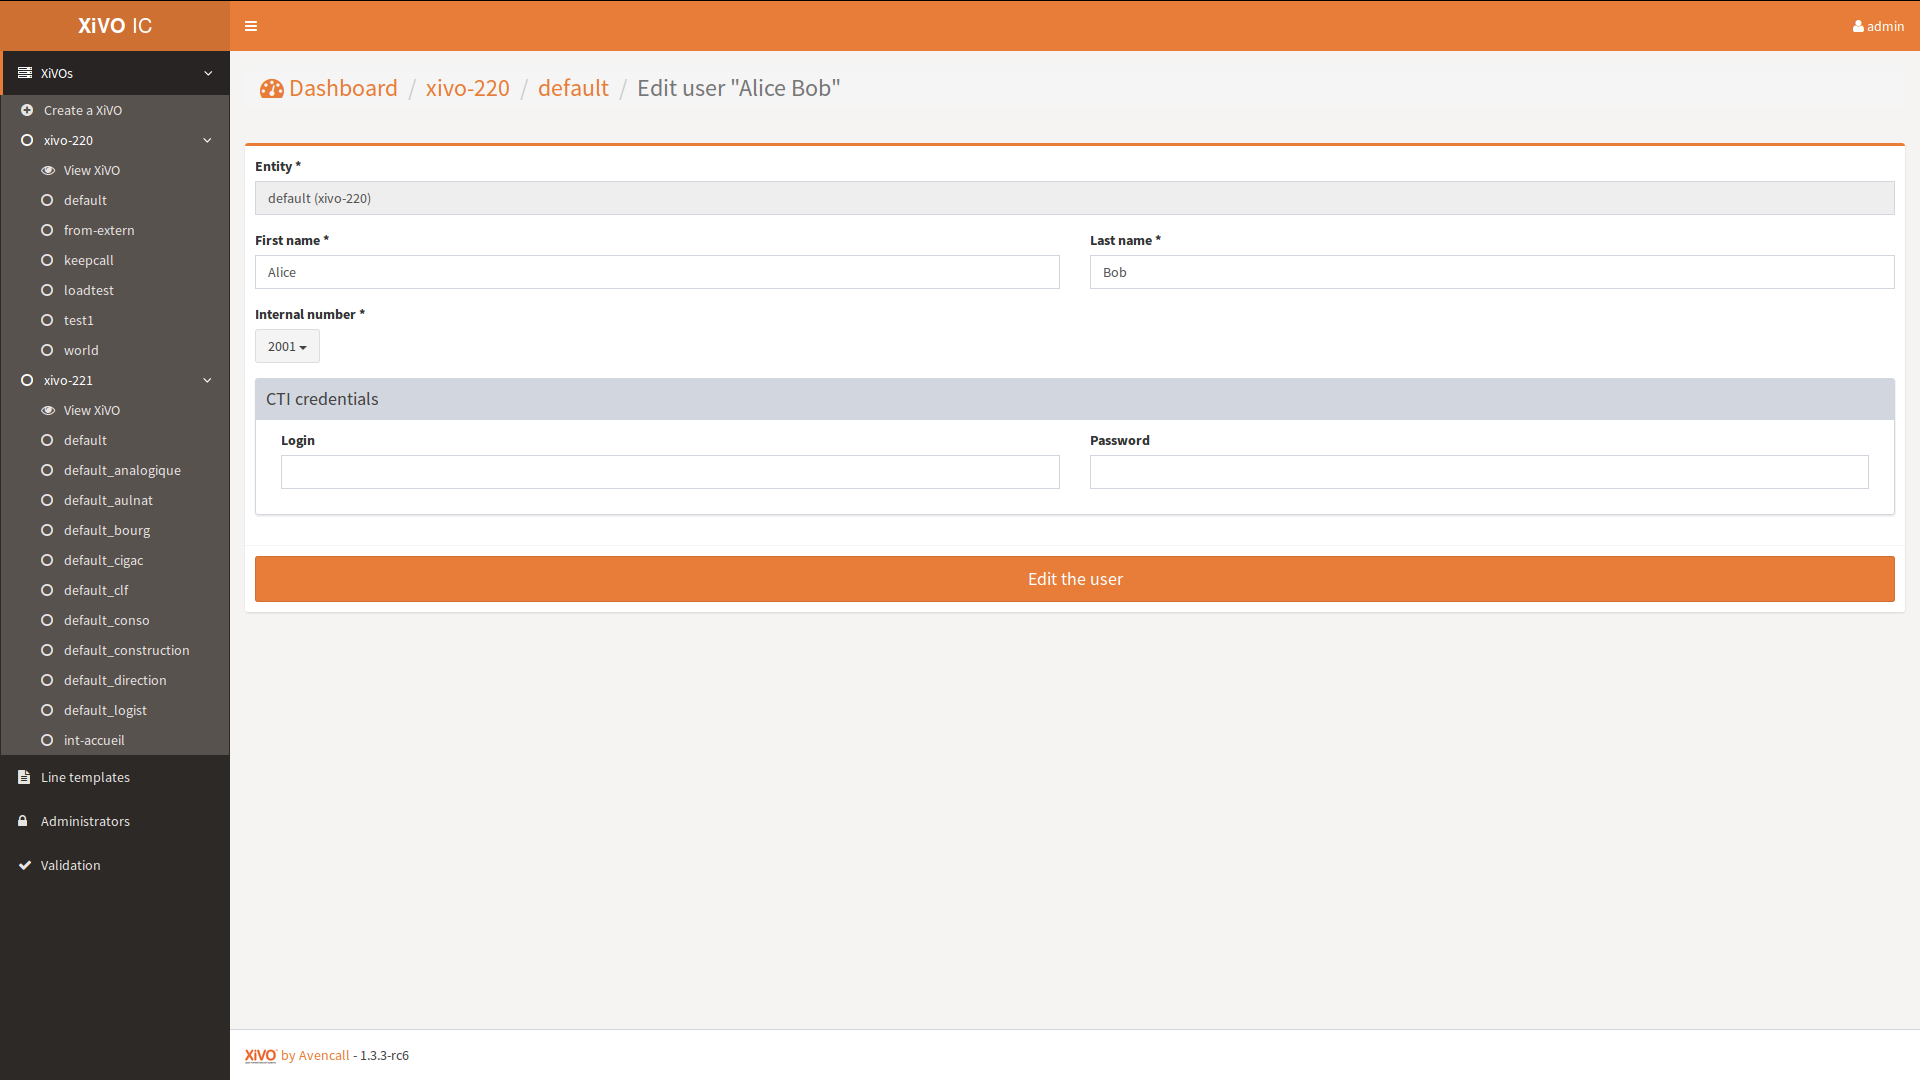
This page allows you to modify a user. Please refer to the Create user section for fields details.
Administrators
List administrators
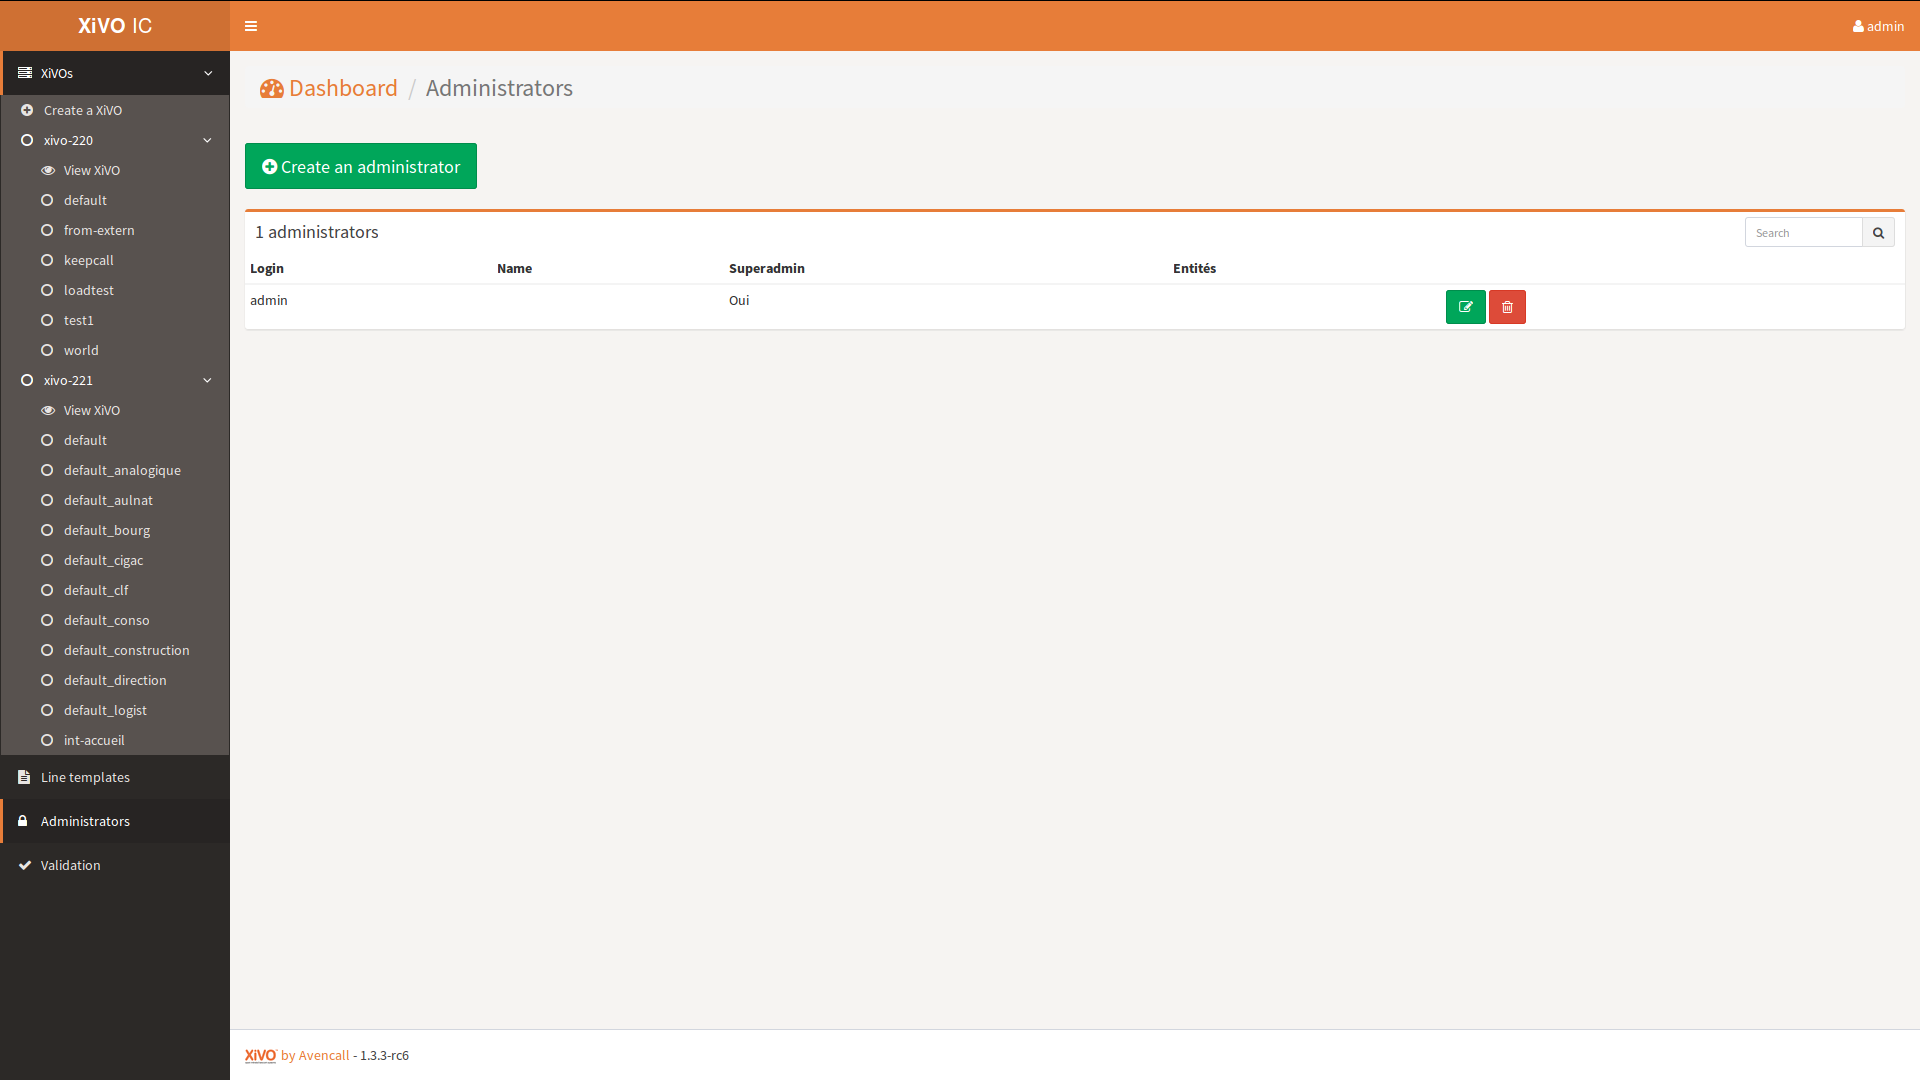
On the sidebar, Administrators has its own link. This page allows you to :
- Add a new administrator by clicking on the green button
- See all the administrators and perform some operations to them :
- Edit one by clicking on the yellow button with the wrench icon
- Delete one by clicking on the red button with the trash icon
Create administrator

This page allows you to add a new administrator. You have to provide the following informations :
- Login : login used by the administrator to connect to XCU
- Name : name that will be displayed on XCU
- LDAP : if checked, the LDAP authentication configured in
application.confwill be used - Password : password used by the administrator to connect to XCU. Shown only if LDAP disabled
- Superadmin : whether or not this administrator is a super-administrator. Super-administrators can manage everything in XCU
- Entities : select the entities this administrator will be able to manage Shown only if Superadmin disabled
Edit administrator
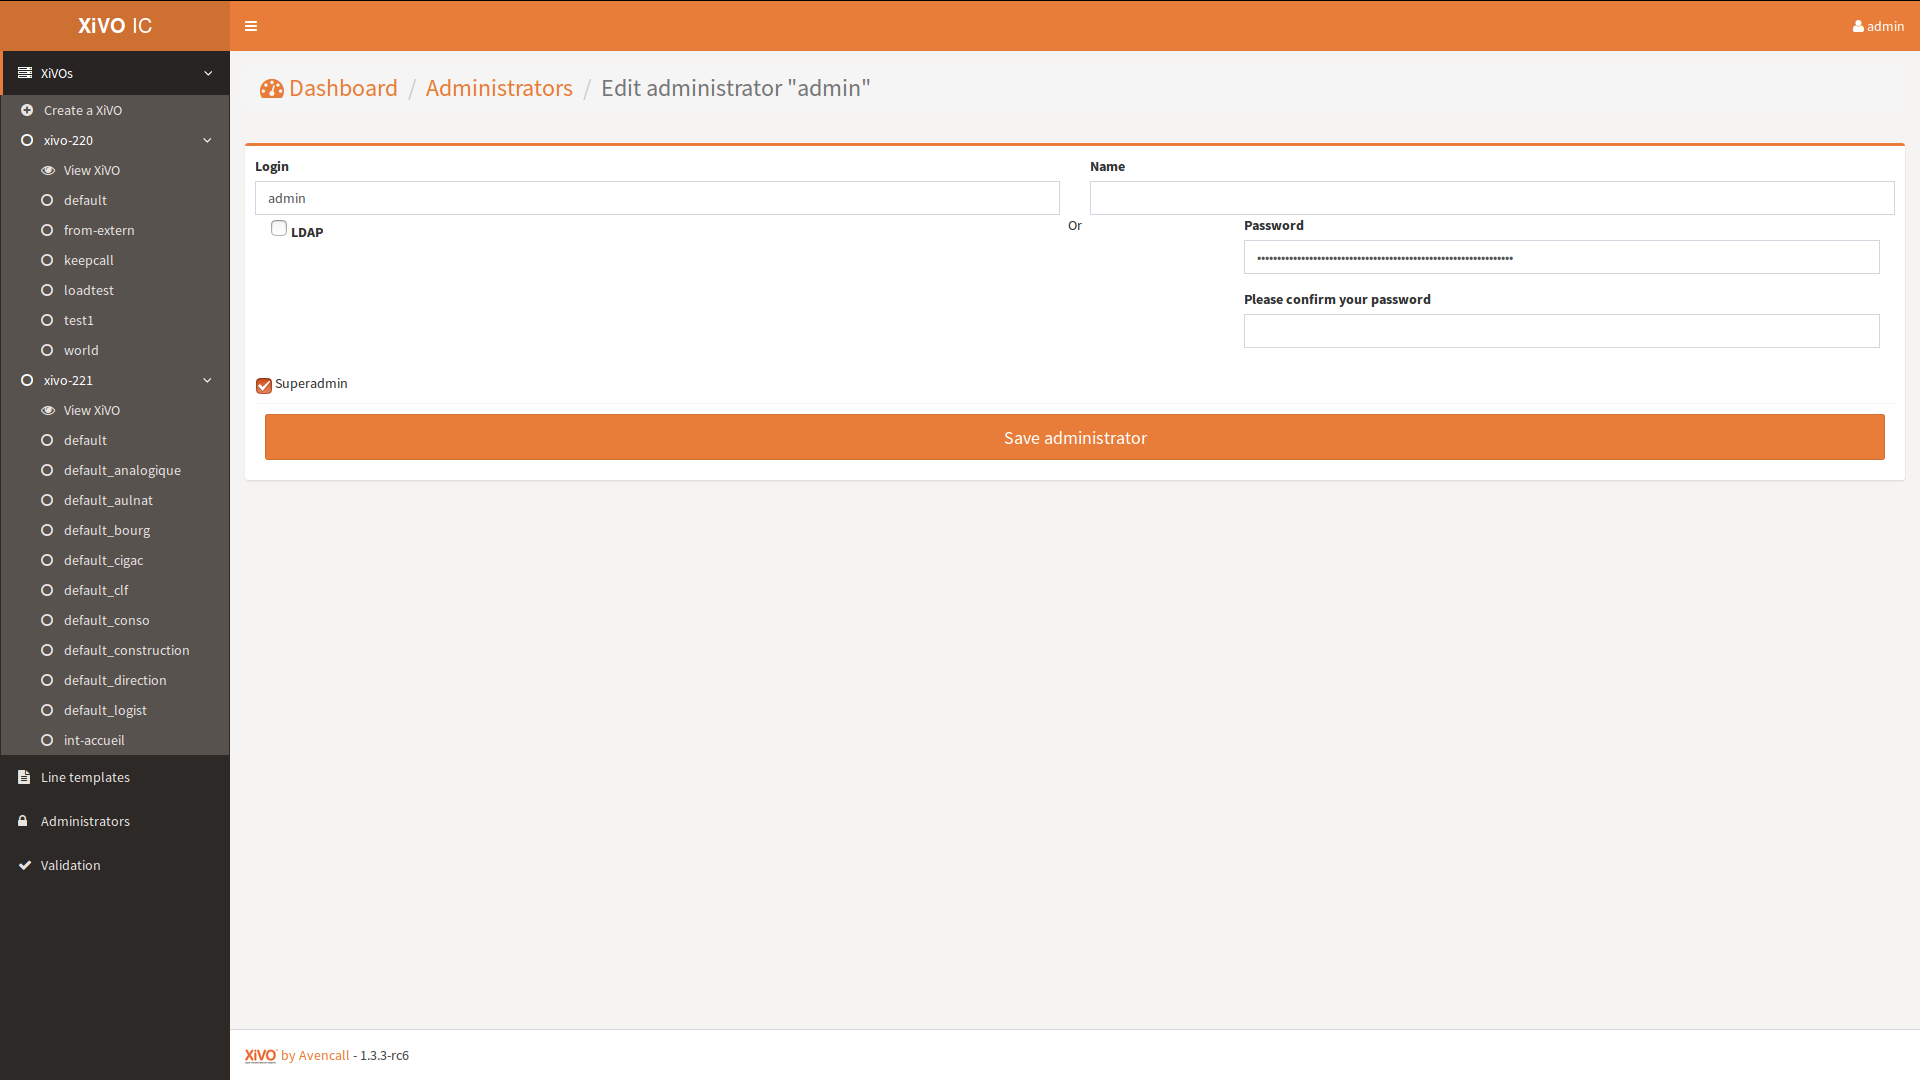
This page allows you to modify an administrator. Please refer to the Create administrator section for fields details.