Basic Configuration
You have two options to get your phone to be provisioned:
Set up a DHCP server
Tell manually each phone where to get the provisioning informations
You may want to manually configure the phones if you are only trying XiVO or if your network configuration does not allow the phones to access the XiVO DHCP server.
You may want to set up a DHCP server if you have a significant number of phones to connect, as no manual intervention will be required on each phone.
Configuring the DHCP Server
XiVO includes a DHCP server that facilitate the auto-provisioning of telephony devices. It is not activated by default.
There’s a few things to know about the peculiarities of the included DHCP server:
it only answers to DHCP requests from supported devices.
it only answers to DHCP requests coming from the VoIP subnet (see network configuration).
This means that if your phones are on the same broadcast domain than your computers, and you would like the DHCP server on your XiVO to handle both your phones and your computers, that won’t do it.
The DHCP server is configured via the page:
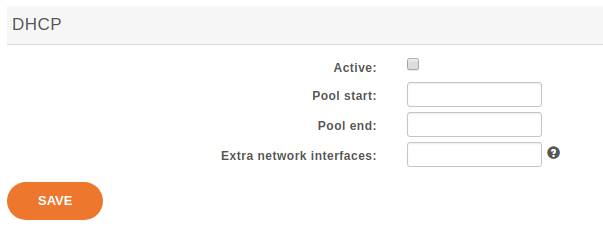
- Active
Activate/desactivate the DHCP server.
- Pool start
The lower IP address which will be assigned dynamically. This address should be in the VoIP subnet. Example:
10.0.0.10.- Pool end
The higher IP address which will be assigned dynamically. This address should be in the VoIP subnet. Example:
10.0.0.99.- Extra network interfaces
A list of space-separated network interface name. Example:
eth0.Useful if you have done some custom configuration in the
/etc/dhcp/dhcpd_extra.conffile. You need to explicitly specify the additional interfaces the DHCP server should listen on.
After saving your modifications, you need to click on Apply system configuration for them to be applied.
Installing provd Plugins
The installation and management of provd plugins is done via the
page.
The page shows the list of both the installed and installable plugins. You can see if a plugin is installed or not by looking at the Action column.
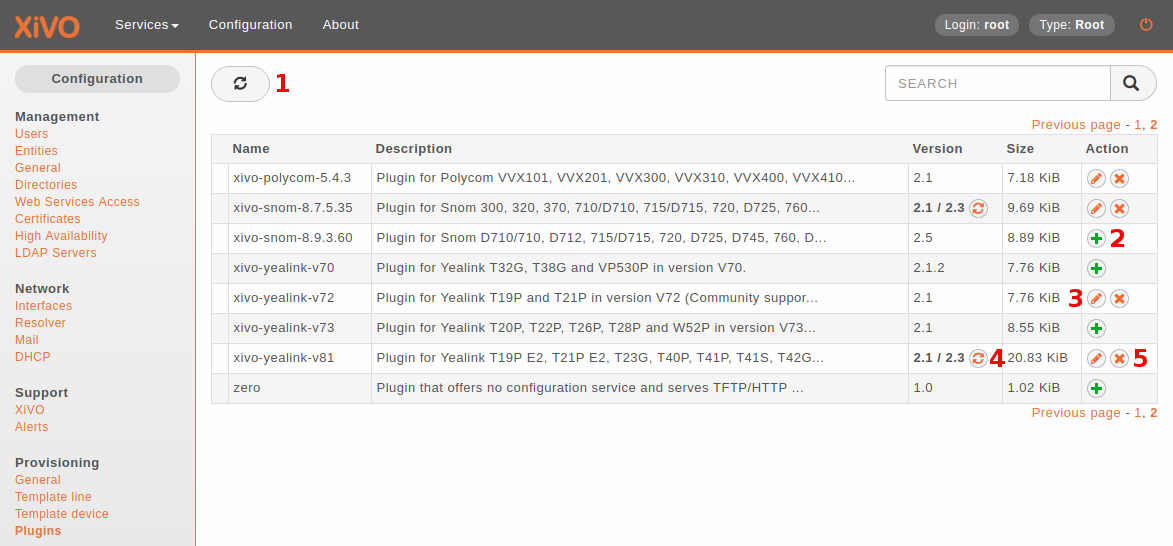
Here’s the list of other things that can be done from this page:
update the list of installable plugins, by clicking on the top left icon (1). On a fresh XiVO installation, this is the first thing to do.
install a new plugin (2)
edit an installed plugin (3), i.e. install/uninstall optional files that are specific to each plugin, like firmware or language files
upgrade an installed plugin (4)
uninstall an installed plugin (5)
After installing a new plugin, you are automatically redirected to its edit page. You can then download and install optional files specific to the plugin. You are strongly advised to install firmware and language files for the phones you’ll use although it’s often not a strict requirement for the phones to work correctly.
Warning
If you uninstall a plugin that is used by some of your devices, they will be left in an unconfigured state and won’t be associated to another plugin automatically.
The search box at the top comes in handy when you want to find which plugin to install for your device. For example, if you have a Cisco SPA508G, enter “508” in the search box and you should see there’s 1 plugin compatible with it.
Note
If your device has a number in its model name, you should use only the number as the search keyword since this is what usually gives the best results.
It’s possible there will be more than 1 plugin compatible with a given device. In these cases, the difference between the two plugins is usually just the firmware version the plugins target. If you are unsure about which version you should install, you should look for more information on the vendor website.
It’s good practice to only install the plugins you need and no more.
Alternative plugins repository
By default, the list of plugins available for installation are the stable plugins for the officially supported devices.
This can be changed in the page, by setting the URL field to one of the following value:
http://provd.xivo.solutions/plugins/1/stable/– officially supported devices “stable” repository (default)http://provd.xivo.solutions/plugins/1/testing/– officially supported devices “testing” repositoryhttp://provd.xivo.solutions/plugins/1/archive/– officially supported devices “archive” repositoryhttp://provd.xivo.solutions/plugins/1/addons/stable/– community supported devices “stable” repositoryhttp://provd.xivo.solutions/plugins/1/addons/testing/– community supported devices “testing” repository
The difference between the stable and testing repositories is that the latter might contain plugins that are not working properly or are still in developement.
The archive repository contains plugins that were once in the stable repository.
After setting a new URL, you must refresh the list of installable plugins by clicking the update icon of the page.
How to manually tell the phones to get their configuration
If you have set up a DHCP server on XiVO and the phones can access it, you can skip this section.
The according provisioning plugins must be installed.
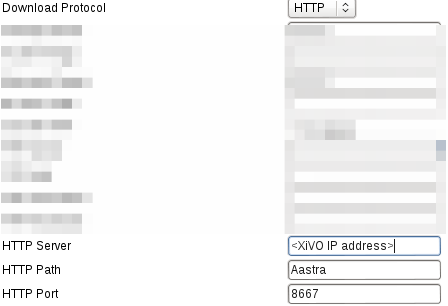
Aastra
On the web interface of your phone, go to , and enter the following settings:
Polycom
On the phone, go to and enter the following settings:
Server type: HTTP
Server address:
http://<XiVO IP address>:8667/000000000000.cfg
Then save and reboot the phone.
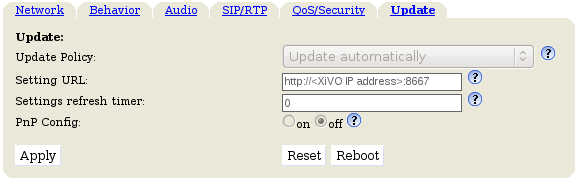
Snom
On the web interface of your phone, go to and enter the following settings:
Yealink
On the web interface of your phone, go to , and enter the following settings:
Server URL:
http://<XiVO IP address>:8667
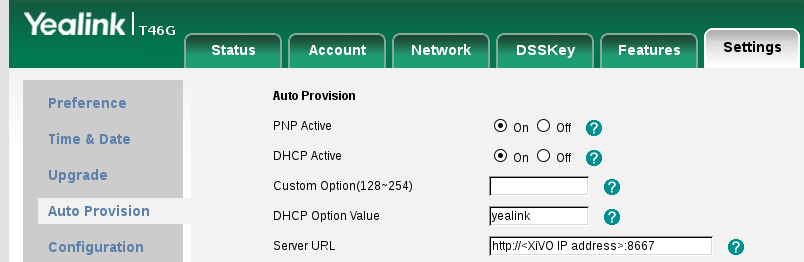
Save the changes by clicking on the Confirm button and then click on the Autoprovision Now button.
Autoprovisioning a Device
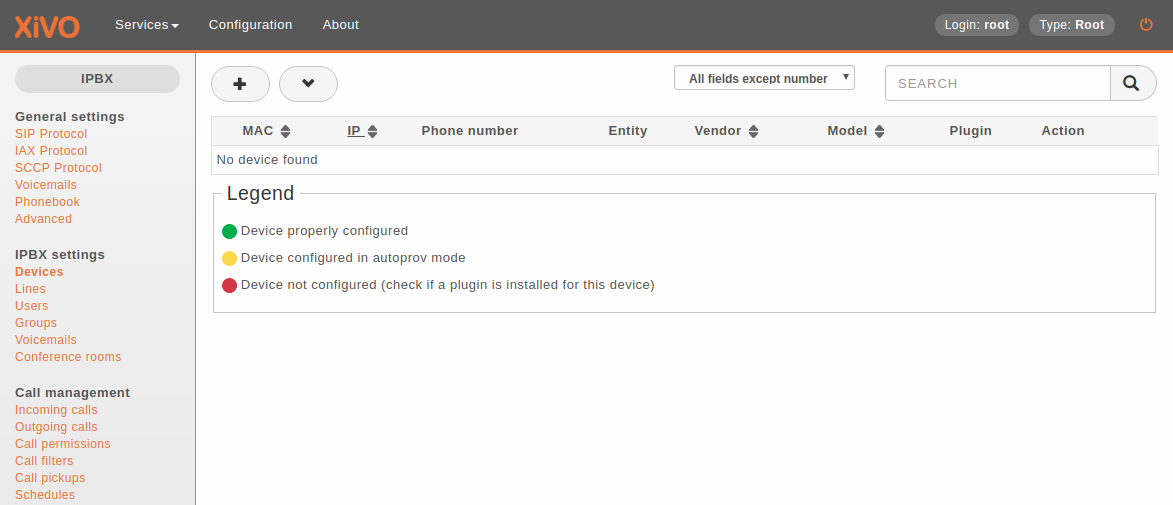
Once you have installed the proper provd plugins for your devices and setup correctly your DHCP server, you can then connect your devices to your network.
But first, go to page. You will then see that no devices are currently known by your XiVO:
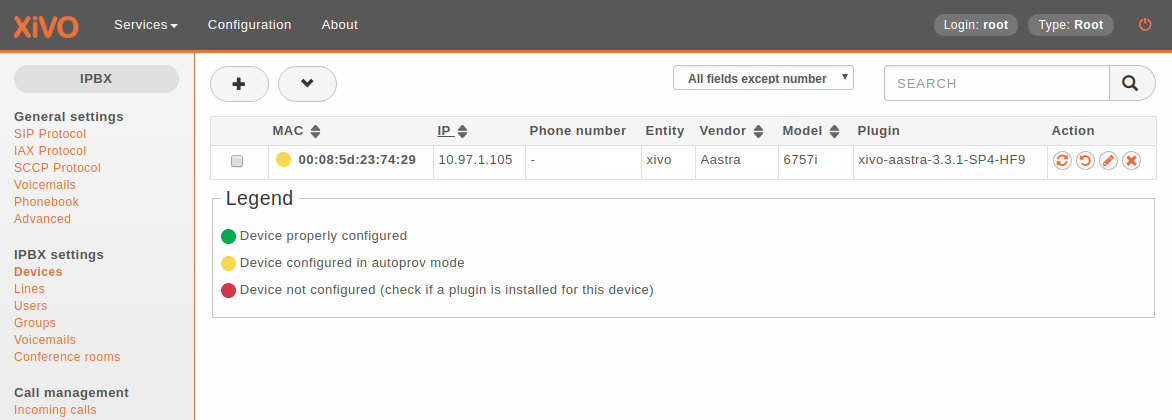
You can then power on your devices on your LAN. For example, after you power on an Aastra 6757i and give it the time to boot and maybe upgrade its firmware, you should then see the phone having its first line configured as ‘autoprov’, and if you refresh the devices page, you should see that your XiVO now knows about your 6757i:
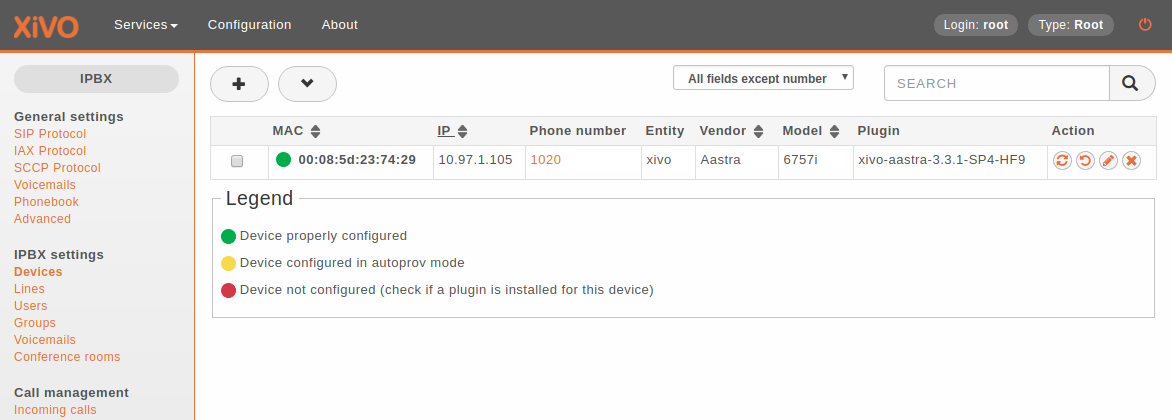
You can then dial from your Aastra 6757i the provisioning code associated to a line of one of your user. You will hear a prompt thanking you and your device should then reboot in the next few seconds. Once the device has rebooted, it will then be properly configured for your user to use it. And also, if you update the device page, you’ll see that the icon next to your device has now passed to green:
Resetting a Device
From the Device List in the Webi
To remove a phone from XiVO or enable a device to be used for another user there are two different possibilities :
click on the
reset to autoprovbutton on the web interface

The phone will restarts and display autoprov, ready to be used for another user.
From the User Form in the Webi
Device With one User Only Associated
Edit the user associated to the device and put the device field to null.
click on the
Savebutton on the web interface
The phone doesn’t restart and the phone is in autoprov mode in the device list.
You can synchronize the device to reboot it.
Device with Several Users Associated
Edit the primary user associated to the terminal (one with the line 1) and put the device field to null.
click on the
Savebutton on the web interface
The primary line of the phone has been removed, so the device will lose its funckeys associated to primary user but there others lines associated to the device will stay provisionned.
The phone doesn’t restart and the phone is in autoprov mode in the device list.
You can synchronize the device for reboot it.
From a Device
Dial *guest (*48378) on the phone dialpad followed by xivo (9486) as a password
The phone restarts and display autoprov, ready to be used for another user.