System Configuration
ACD Outgoing Calls For Call Blending
Use the following only if you want to use “Least Recent” call distribution strategy and that outbound agent calls have to be taken into account by the distribution strategy.
By default, when your agents process incoming and outgoing calls, the call distribution will not take into account agents which are in outgoing calls in the least recent call strategy and at the end of an outgoing call there is no wrapup. So an agent can be distributed just after an outgoing calls even if another agent is free for a longer time, because the outgoing call is not taken into account by the distribution strategy.
You will find below how to improve that.
XiVO-CC agent can make outgoing calls through an outgoing queue. This brings the statistics and supervision visualization for outgoing ACD calls. However, some special configuration steps are required:
Configuration Steps
You need to create an outgoing queue with
- in tab General:
- Name: starting with ‘out’, e.g. outbound,
- Number: some number
- Music On-Hold: None
- Preprocess subroutine: xuc_outcall_acd
- in tab Application:
- Ringing Time: 0
- Ring instead of On-Hold music: activated
- in tab General:
Deploy the subroutine on the XiVO server (to
/etc/asterisk/extensions_extra.d/or through the web interface), the file is available from https://gitlab.com/xivo.solutions/xucserver/raw/master/xivo/outbound/xuc_outcall_acd.conf, with owner asterisk:www-data and rights 660.Agent will have to be logged on this queue
You must also deploy the file
generate_agent_skills.py:cd /usr/local/sbin wget https://gitlab.com/xivo.solutions/xucserver/raw/master/xivo/skills/generate_agent_skills.py chmod 755 generate_agent_skills.py
Furthermore, you must replace the file
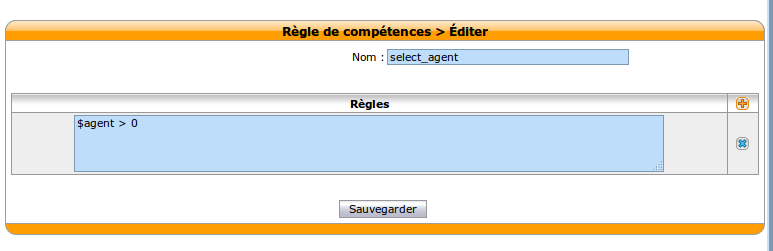
/etc/asterisk/queueskills.confby the following one https://gitlab.com/xivo.solutions/xucserver/raw/master/xivo/skills/queueskills.conf (be sure to backup the original one), without changing the owner or rightsAnd finally you need to add a new skill rule on the Xivo server: , with name select_agent and rules
$agent > 0
Ensure file’s rights are correct with command xivo-fix-paths-rights
Reload the asterisk configuration core reload
How to check correct configuration :
Check if agent is logged in the outbound queue
jyl-rennes*CLI> queue show outbound
outbound has 0 calls (max unlimited) in 'ringall' strategy (0s holdtime, 0s talktime), W:0, C:0, A:0, SL:0.0% within 0s
Members:
  Agent/2500 (Local/id-19@agentcallback from SIP/ihvbur) (ringinuse disabled) (dynamic) (Not in use) (skills: agent-19) has taken no calls yet
No Callers
Check the skills attached to the agent by displaying it’s agent group
jyl-rennes*CLI> queue show skills groups agent-19
Skill group 'agent-19':
  - agent_19       : 100
  - agent_no_2500  : 100
  - genagent       : 100
If the agent dial an outbound call of more than 6 digits (default) you should see the internal queue statistics updated
jyl-rennes*CLI> queue show outbound
outbound has 0 calls (max unlimited) in 'ringall' strategy (0s holdtime, 34s talktime), W:0, C:1, A:0, SL:100.0% within 0s
   Members:
      Agent/2500 (Local/id-19@agentcallback from SIP/ihvbur) (ringinuse disabled) (dynamic) (Not in use) (skills: agent-19) has taken 1 calls (last was 1 secs ago)
   No Callers
Once done, calls requested by an agent through the Cti.js with more than 6 digits are routed via the outgoing queue. You can change the number of digits using the parameter xuc.outboundLength in the XuC’s configuration.
Ldap Authentication
Xuc
Configure LDAP authent for CCmanager, UC Assistant and CC Agent
You need to include in the compose.yml file a link to a specific configuration file by adding in xuc section a specific volume and an environment variable to specify the alternate config file location
xuc:

....

environment:
....
- CONFIG_FILE=/conf/xuc.conf

volumes:
- /etc/docker/xuc:/conf
Edit in /etc/docker/xuc/ a configuration file named xuc.conf to add ldap configuration (empty by default)
include "application.conf"

authentication {
  ldap {
    managerDN = "uid=company,ou=people,dc=company,dc=com"      # user with read rights on the whole LDAP
    managerPassword = "xxxxxxxxxx"                             # password for this user
    url = "ldap://ldap.company.com:389"                        # ldap URI
    searchBase = "ou=people,dc=company,dc=com"                 # ldap entry to use as search base
    userSearchFilter = "uid=%s"                                # filter to use to search users by login, using a string pattern
  }
}
Recreate the container : xivocc-dcomp up -d xuc
Kerberos Authentication
To enable Kerberos authentication and single sign on feature, you need to have an existing Kerberos infrastructure with a
Key Distribution Center and a Ticket Granting Service. You need to be able to create a service, construct a kerberos server configuration and export a keytab to perform the following configuration. This service must be on the kerberos realm used by your users and must match the dns name of the server hosting the XUC server (or the nginx reverse proxy server if you use one). For example, assuming you have a realm named MYDOMAIN, you can create a service named HTTP/xuc.mydomain and a dns entry for xuc.mydomain pointing the server hosting the XUC.
Warning
The created domain name must be trusted by the user’s browser.
Prerequisites
Create a service for the XUC host, for example:
addprinc HTTP/xuc.mydomain
Export the keytab file, for example:
ktadd -k xuc.keytab HTTP/xuc.mydomain
Warning
The bash commands detailed here are for demonstration only and needs to be adapted to your specific environment. It shows how to create a service for the XUC Server named HTTP/xuc, associated to the example realm mydomain.
Only the following encryption types are supported by XiVOCC:
- aes256-cts-hmac-sha1-96
- arcfour-hmac
- des3-cbc-sha1
- des-cbc-crc
XiVOCC Configuration
Download the Zulu Cryptography Extension Kit from http://www.azulsystems.com/products/zulu/cryptographic-extension-kit
Extract the content of the downloaded file
ZuluJCEPolicies.zipon the server hosting the XUC docker container in the folder/etc/docker/xuc/(Folder should contain at leastlocal_policy.jar&US_export_policy.jarfiles)Copy the previously generated
xuc.keytabkeytab file to the server hosting the XUC docker container, for example:/etc/docker/kerberos/xuc.keytab.Create or edit the file
/etc/krb5.confon the server hosting the XUC docker container and change settings according to your kerberos environment. For example, the file may contain (name and ip addresses must match your kerberos environment):[libdefaults] default_realm = MYDOMAIN [realms] MYDOMAIN = { kdc = 172.17.0.14 admin_server = 172.17.0.14 }
Edit the docker compose file
/etc/docker/compose/docker-xivocc.ymlto add the following configuration in the xuc section (file name, service name, password may differ on your setup):xuc: # ... environment: - JAVA_OPTS=-Dsecured.krb5.principal=HTTP/xuc.mydomain -Dsecured.krb5.password=xuc -Dsecured.krb5.keyTab=/etc/kerberos/xuc.keytab # ... volumes: - /etc/docker/kerberos:/etc/kerberos - /etc/docker/xuc/local_policy.jar:/usr/lib/jvm/zulu-8-amd64/jre/lib/security/local_policy.jar - /etc/docker/xuc/US_export_policy.jar:/usr/lib/jvm/zulu-8-amd64/jre/lib/security/US_export_policy.jar - /etc/krb5.conf:/etc/krb5.conf
Enable
Single Sign Onon the Agent, Manager, Web and Desktop application interface. Change the value of the following environment variables in the /etc/docker/compose/custom.env:# ... USE_SSO=true XUC_HOST=xuc.mydomain # ...
Browser configuration
The created domain name must be trusted by the user’s browser.
For Chrome (windows):
- Internet Option : Add domain with protocol to the list of trusted sites : http://xuc.mydomain (and/or https://xuc.mydomain ).
Warning
Kerberos authentication on Chrome is only available on Microsoft Windows.
For Firefox:
- Go to
about:config - add domain (without protocol) to the
network.negotiate-auth.delegation-urisentry (ie.xuc.mydomain). - add domain (without protocol) to the
network.negotiate-auth.trusted-urisentry (ie.xuc.mydomain).
Install trusted certificate for nginx
To install a trusted certificate for the nginx reverse proxy instead of the self signed certificate, follow the following instructions:
- in directory
/etc/docker/nginx/sslreplace content of filesxivoxc.crt,xivoxc.csrandxivoxc.keywhile keeping filenames unchanged - restart nginx container by command
xivocc-dcomp restart nginx.
Warning
When configuring the certificate, please ensure the certificate chain is complete, especially for the XiVO Mobile Assistant. You can check the server certificate chain by using the following web site https://www.ssllabs.com/ssltest/analyze.html which will warn you if there is an error with the certificate (Chain issues - Incomplete)
What is a complete certificate chain
When a client application (browser or mobile application) checks a certificate for a web site, it checks the received certificate is issued by a known certificate authority and matches the web site domain name. But sometimes, the certificate is not issued by a root certificate authority but by an intermediate authority.
Here is an example of a such a certificate chain:
GeoTrust Global CA
|--> RapidSSL SHA256 - CA - G3
     |--> *.company.com
The possible problem here is that even if the browser knows the root authority, it is unaware of the intermediate one. The solution is to create a bundle of the complete certificate chain by concatenating the certificates of all parties (root, intermediate & site). Please see http://nginx.org/en/docs/http/configuring_https_servers.html#chains for more information.
Mobile Assitant
If using an HTTPS connection for the XiVO Mobile Assistant, you must use a trusted certificate with a complete certification chain, see Install trusted certificate for nginx.