UC Assistant
Note
This section describes the feature of the UC Assistant application. It is available as a web application from your Web Browser. It is also available as a desktop application with these additionnal features:
- show integrated popup when receiving call
- get keyboard shortcut to answer/hangup and make call using Select2Call feature
- handle callto: and tel: links
To install the desktop application, see the desktop application installation page.
What is the XiVO UC Assistant ?
The XiVO UC Assistant is a Web application that enables a user to:
- search contacts and show their presence, phone status
- make calls through physical phone or using WebRTC
- transfer incoming or outgoing calls
- access voicemail
- enable call forwarding and Do Not Disturb (aka DND)
- show history of calls
Login
To login, you must have a user configured on the XiVO PBX with:
- XiVO Client enabled,
- Login, password and profile configured
- A configured line with a number
Warning
If a user tries to login without a line, an error message is displayed and user is redirected to the login page (this applies also to Desktop Applications )

Note
A Remember me option is available at prompt page to keep you signed in, when you want automatic login.
Search
You can use the search section to lookup for people in the company, results will display all information known for the user (phone numbers and email). You can either click on number to call, or click on copy button to put the number in your clipboard to paste it elsewhere.
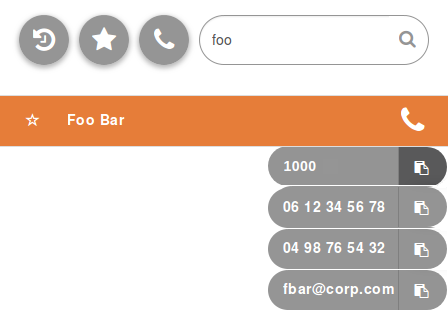
To enable this feature, you must configure the directories in the XiVO PBX as described in Directories and Views.
Note
Integration note: the UC Assistant support only the display of
- 1 field for name (the one of type name in the directory display)
- 3 numbers (the one of type number and the first two of type callable)
- and 1 email
Forwarding Calls and DND
From UC Assistant you can activate Do Not Disturb to block all incoming calls or forward call to any another number just by clicking on action button as seen on following screenshot:
Once you choose an action, you just need to apply on clicking on associated button.
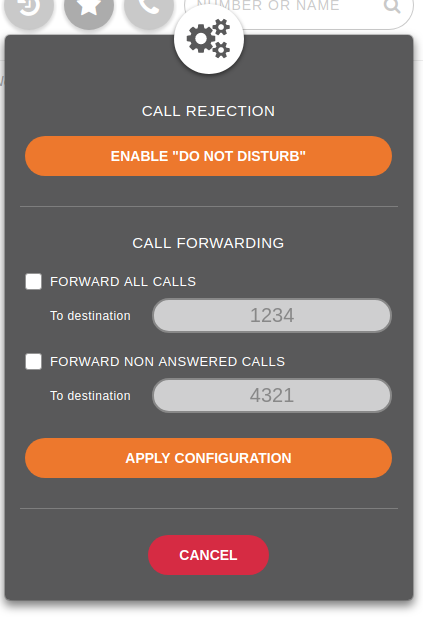
Action possibles are :
- Enable DND
- Disable DND
- Edit call forwarding (for both unconditional or on missed call only)
You know that all incoming calls will be rejected once you see the following logo in the header bar :
All calls are forwarded once you see this following one :
Finally, calls are forwarded only if you missed it when you see this one :
Note
If calls are redirected, the forward number will be shown under your name.
Nevertheless, there is a precedence, if DND mode is enabled and also call forwarding, calls will be rejected. If forward on miss call and all call forward are enabled, all calls will be forwarded to number configured for all call forwarding.
Favorites
Click on the star to put a contact in its list of favorites. Favorites must be configured in the XiVO PBX as described in Favorites.
Personal contacts
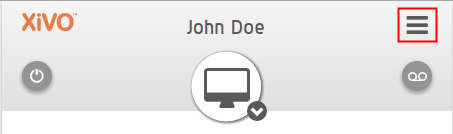
From top-right hamburger menu, it is possible to display additional actions to handle you personal contacts. You will be able to create, delete all, import and export personal contact that you will be either able to search from toolbar or find them in favorites panel if starred.
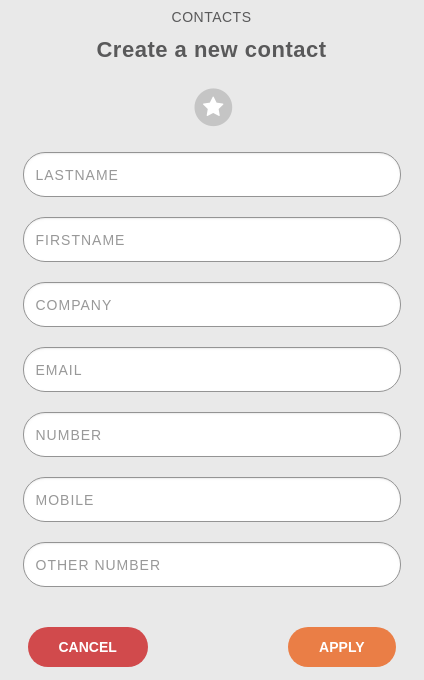
Create a personal contact
Just fill wanted fields (such as name and number), click on star if you want this contact to be displayed in favorites panel.
Warning
It is not possible to have twice the same personal contact, at least one field must differ.
It’s also possible to create a personal contact from call history by hovering a call item and so have pre-filled fields.
Edit a personal contact
To edit a personal contact, you should search it first, then you just hover it, and a pencil icon should appear as in following screen:

Once clicked, you are redirected to edition pane where you just fill wanted fields.
Delete a personal contact
To delete a personal contact, you should edit it first, then you just need to click on trashcan icon :
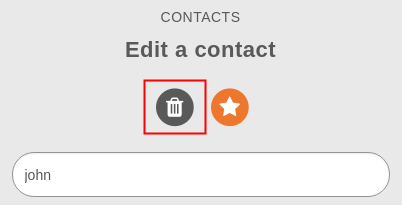
Once clicked, you are invited to confirm or not the deletion of this contact.
Import personal contacts
From menu, you can upload a .csv file that contains all the data of your personal contacts. You can either use a file exported from this same interface or create yours.
Here are the list of available attributes of a personal contact:
companyemailfaxfirstnamelastnamemobilenumber
As an example here a csv file that can be imported
company,email,fax,firstname,lastname,mobile,number
corp,jdoe@company.corp,3333,John,Doe,2222,1111
Note
File exported from previous xivo-client is also compatible with UC assistant.
Reverse lookup
By default, reverse lookup is enabled for personal contact display on incoming calls. Configuration is set to display firstname and lastname if number or mobile matches an existing personal contact.
Phone integration
The UC Assistant can integrate with the phone to :
*) See Known limitations
As these features are closely linked to the phone to work, you must check Supported phones for UC Assistant and CC Agent and follow the Required configuration page.
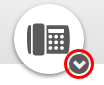
Once, you’re phone is properly configured and you are connected as a user, you know that your using SIP phone once you see the following logo in the header bar :
Conferences
When joining a conference, either as an attendee or an organizer, the UC Assistant will display specific informations about the conference you are joining.
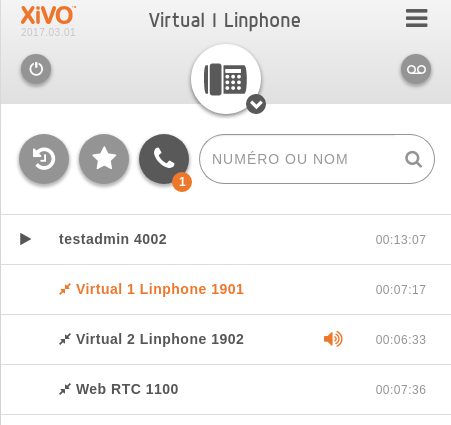
Conference information:
- The timer next to the conference name displays how long the conference has been running
- When hovering, the number of attendee will be displayed
Conference actions:
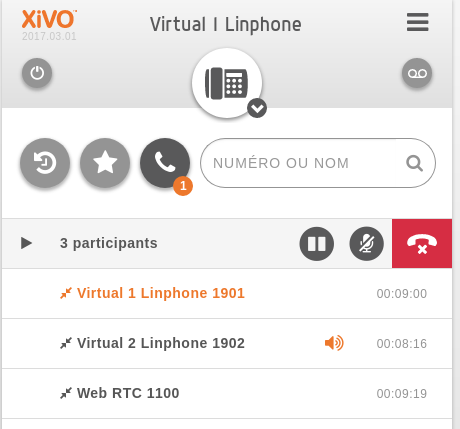
As an attendee, you can only:
- Exit a conference room by clicking the hangup button
- Put the conference on hold. Other attendees will not hear any hold music but will not be able to hear you neither you will be able to hear the conference room.
As an organizer, you will be able to mute and unmute all other attendee in the conference room.
Attendees information:
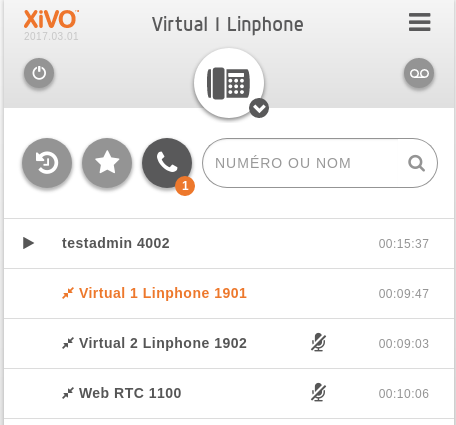
- Attendees name, number and timer are displayed below the conference name.
- Attendees are ordered by name with the exception of the first one which always reflect the current user
- Conference organizer are displayed in orange
- When an attendee is muted, an slashed microphone icon will be displayed next to its name
- When an attendee is talking, an orange speaker will be displayed next to its name
Attendee action:
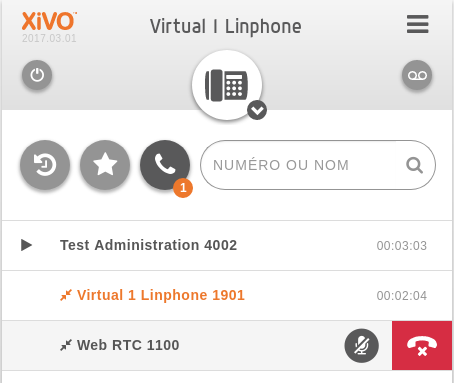
When hovering your own user, you can mute and unmute yourself. Organizer can also:
- Mute and unmute any attendee
- Kick out an attendee. A message will be played to the kicked out attendee before leaving the conference.
WebRTC integration
The UC Assistant can be used by users with WebRTC configuration, without physical phone.
For configuration and requirements, see WebRTC Environment.
You know that your using WebRTC once you see the following logo in the header bar :
Experimental video call feature
Note
This experimental feature needs to be enabled in the configuration (see Experimental video call feature).
When logged in as a user with a WebRTC line you can initiate and receive an audio/video call. The video call is possible only from your favorite contacts or the directory search result through the video camera icon. When the called user doesn’t support video calls, call is established as audio only.
In the current implementation you can put the call on hold, go fullscreen, but for the moment you can have only one video call at a time and you can’t transfer the video call. Conference is not supported yet.
*55 (echo test)
To test your microphone and speaker, you may call the echo test application. After a welcome message, the application will echo everything what you speak.
- Dial the *55 number from your Desktop Assistant.
- You should hear the “Echo” announcement.
- After the announcement, you will hear back everything you say.
- If you hear what you are saying it means that your microphone and speakers are working.
- Press # or hangup to exit the echo test application.