LDAP
XiVO offers the possibility to integrate LDAP servers. Once configured properly, you’ll be able to search your LDAP servers from your XiVO client and from your phones (if they support this feature).
Note
This page describes how to add LDAP servers as sources of contacts. For other sources of contacts, see Directories.
Add a LDAP Server
You can add a LDAP server by clicking on the add button at the top right corner of the page. You’ll then be shown this page:
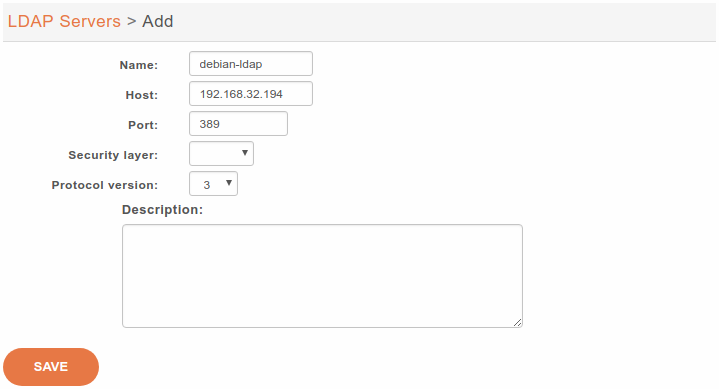
Adding a LDAP server
Enter the following information:
- Name: the server’s display name
- Host: the hostname or IP address
- Port: the port number (default: 389)
- Security layer: select SSL if it is activated on your server and you want to use it (default: disabled)
- SSL means TLS/SSL (doesn’t mean StartTLS) and port 636 should then be used
- Protocol version: the LDAP protocol version (default: 3)
Warning
When editing an LDAP server, you’ll have to restart the CTI server for the changes to be taken into account.
Notes on SSL/TLS usage
If you are using SSL with an LDAP server that is using a CA certificate from an
unknown certificate authority, you’ll have to put the certificate file as a
single file ending with .crt into /usr/local/share/ca-certificates
and run update-ca-certificates.
You also need to make sure that the /etc/ldap/ldap.conf file contains a
line TLS_CACERT /etc/ssl/certs/ca-certificates.crt.
After that, restart spawn-fcgi with service spawn-fcgi restart.
Also, make sure to use the FQDN of the server in the host field when using SSL. The host field must match exactly what’s in the CN attribute of the server certificate.
Add a LDAP Filter
Next thing to do after adding a LDAP server is to create a LDAP filter via the page.
You can add a LDAP filter by clicking on the add button at the top right of the page. You’ll then be shown this page:
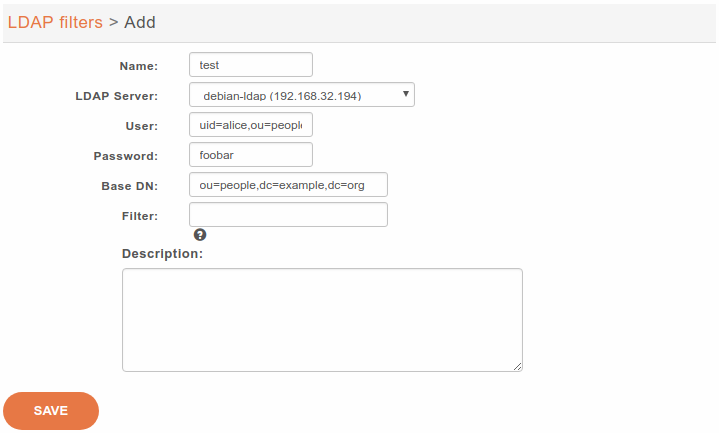
Adding a LDAP Filter
Enter the following information:
- Name: the filter’s display name
- LDAP server: the LDAP server this filter applies to
- User: the
dnof the user used to do search requests - Password: the password of the given user
- Base DN: the base
dnof search requests - Filter: if specified, it replace the default filter
Use a Custom Filter
In some cases, you might have to use a custom filter for your search requests instead of the default filter.
In custom filters, occurrence of the pattern %Q is replaced by what the user entered
on its phone.
Here’s some examples of custom filters:
cn=*%Q*&(cn=*%Q*)(mail=*@example.org)|(cn=*%Q*)(displayName=*%Q*)
Add a Directory Definition
The next step is to add a directory defintion for the LDAP filter you just created. See the directories section for more information.
Here’s an example of an LDAP directory definition:
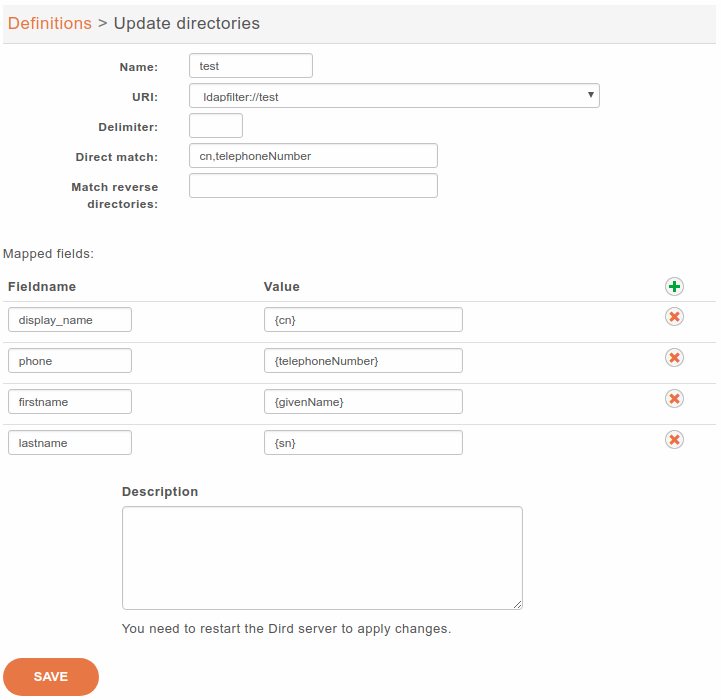
If a custom filter is defined in the LDAP filter configuration, the fields in direct match will be added to that filter using an &. To only use the filter field of your LDAP filter configuration, do not add any direct match fields in your directory definition.
Example:
- Given an LDAP filter with filter
st=Canada - Given a directory definition with a direct match
cn,o - Then the resulting filter when doing a search will be
&(st=Canada)(|(cn=*%Q*)(o=*%Q*))