Switchboard
This page describes the configuration needed to have a switchboard on your XiVO.
Overview
Switchboard functionality is available in XiVO CC or UC Add-on.
The switchboard application allows an operator to view incoming calls, answer them, put calls on hold, view and retrieve the calls on hold. See the Switchboard page for detailed explaination on usage.
The goal of this page is to explain how to configure your switchboard.
Configuration
Quick Summary
In order to configure a switchboard on your XiVO, you need to:
Create a queue for your switchboard
Create a queue for your switchboard’s calls on hold
Create the users that will be operators
Create an agent for your user
Assign the incoming calls to the switchboard queue
For each operator, add a function key for logging in or logging out from the switchboard queue.
Set “no answer” destinations on the switchboard queue
Supported Devices
The supported phones for the switchboard are:
Brand |
Model |
XiVO version |
Plugin version |
|---|---|---|---|
Snom |
D735 |
>= Electra |
>= xivo-snom-10.1.46.16, v3.0.3 |
Yealink |
T54W |
>= Electra |
>= xivo-yealink-v84, v1.4.2 |
WebRTC |
>= Electra |
N.A. |
|
Snom Phones
When using a Snom switchboard, you must not configure a function key on position 1.
To be able to use a Snom phone for the switchboard, the XiVO must be able to do HTTP requests to
the phone. This might be problematic if there’s a NAT between your XiVO and your phone. The
following command should work from your XiVO’s bash command line wget http://guest:guest@<phone IP
address>/command.htm?key=SPEAKER. If this command does not activate the phone’s speaker, your
network configuration will have to be fixed before you can use the Snom switchboard.
If you changed the administrator username or administrator password for your phone, via , you need to follow the Configuration Customization procedure.
Yealink Phones
When using a Yealink switchboard, you must not configure a function key on position 1.
Create a Queue for Your Switchboard
All calls to the switchboard will first be distributed to a switchboard queue.
To create this queue, go to and click the add button.
The following configuration is mandatory :
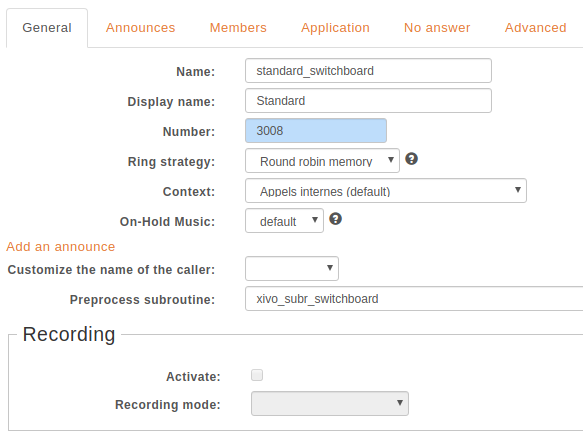
General tab:
Name field must end with
_switchboardsuffix (e.g. standard_switchboard)Number field must valid number in a context
Preprocess subroutine field has to be
xivo_subr_switchboard
Advanced tab:
Member reachability timeout option must be disabled
Time before retrying a call to a member option should be 5 second
Delay before reassigning a call option must be disabled
Call a member already on option must be disabled
Autopause agents option has to be No
Create Hold Queue
Depending on your customer workflow you can create either:
a single general hold queue that will be shared among all the operator of the switchboard
or a personal hold queue per switchboard operator
Create a General Hold Queue for Your Switchboard
The switchboard uses a queue to track its calls on hold.
To create this queue, go to and click the add button.
The following configuration is mandatory :
General tab:
Name field MUST:
start with the name of your switchboard incoming call queue
and end with
_holdNote
For example, if the switchboard incoming call queue is standard_switchboard, the name of the switchboard hold queue must be standard_switchboard_hold.
Number field must a valid number in a context reachable by the switchboard operator
Advanced tab:
Join an empty queue option list has to be empty
Remove callers if there are no agents option list has to be empty
Create a Personal Hold Queue for Your Switchboard
A switchboard operator can have a personal hold queue instead of the general hold queue.
Note
A personal hold queue will always have the priority over the general one, meaning that the calls on hold for this operator will be sent by default to their personal hold queue.
To create this queue, go to and click the add button.
The following configuration is mandatory :
General tab:
The Name field MUST:
start with the name of the switchboard incoming calls queue
and end with
_holdand the operator’s agent numberNote
For example, if the switchboard incoming call queue is standard_switchboard and operator agent number is 8002, the name of its personal switchboard hold queue must be standard_switchboard_hold_8002.
The Number field must a valid number in a context reachable by switchboard operator
Advanced tab:
Join an empty queue option list has to be empty
Remove callers if there are no agents option list has to be empty.
Create the Users that will be Operators
Each operator needs to have a user configured with a line.
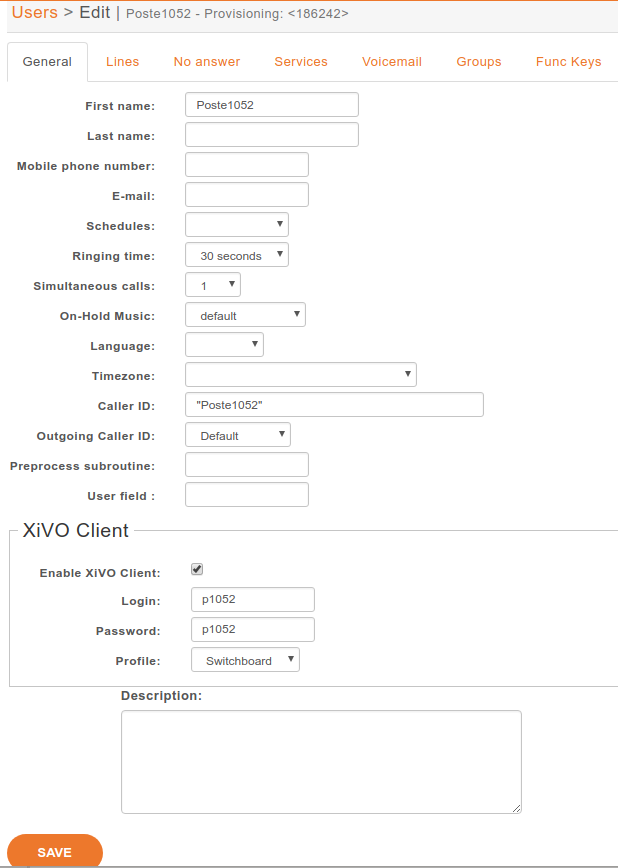
The following configuration is mandatory for switchboard users
General tab:
First name field has to be set
Enable CTI account option has to be enabled
Login field has to be set
Password field has to be set
Lines tab:
Number field has to have a valid extension
Device field has to be a supported device
Services tab:
Enable supervision option has to be enabled
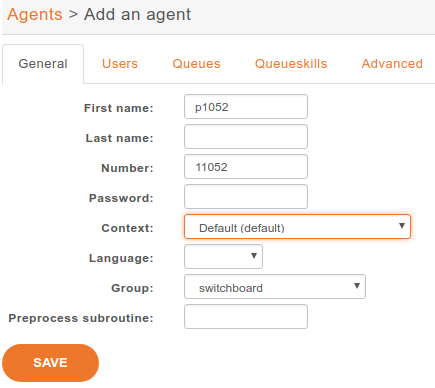
Create Agents for the Operator’s Users
Each operator’s user needs to have an associated agent.
Warning
Those agents must be members of the switchboard queue only, they should not be a member of any other queue. The Hold Queue(s) (General Hold Queue/Personnal Hold Queues) must have NO members.
To create an agent:
Go to
Click on the group default
Click on the Add button
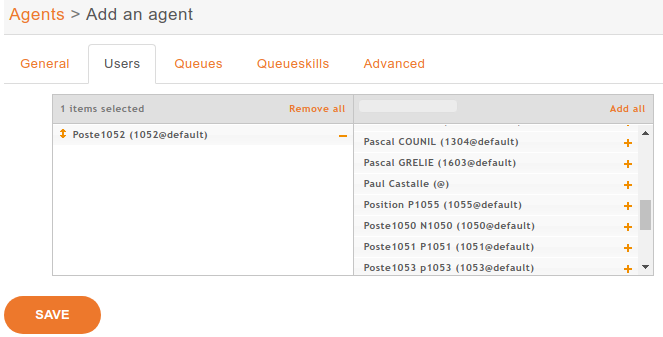
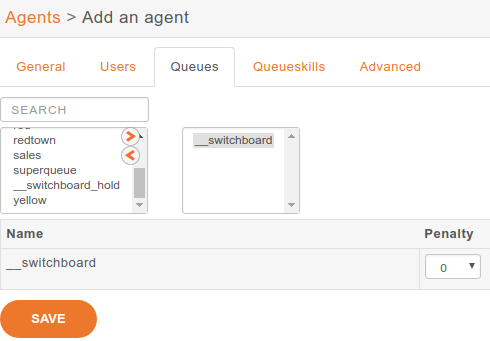
Associate the user to the agent in the Users tab
Assign the Agent to the Switchboard Queue.
Optional Configuration
Send Incoming Calls to the Switchboard Queue
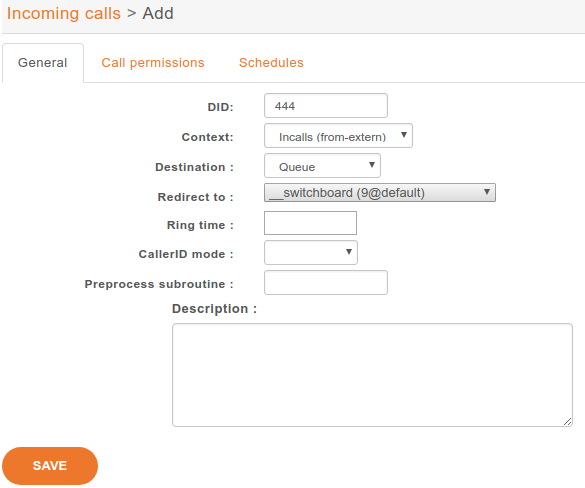
Incoming calls must be sent to the Switchboard queue to be distributed to the operators. To do this, we have to change the destination of our incoming call for the switchboard queue.
In this example, we associate our incoming call (DID 444) to our Switchboard queue:
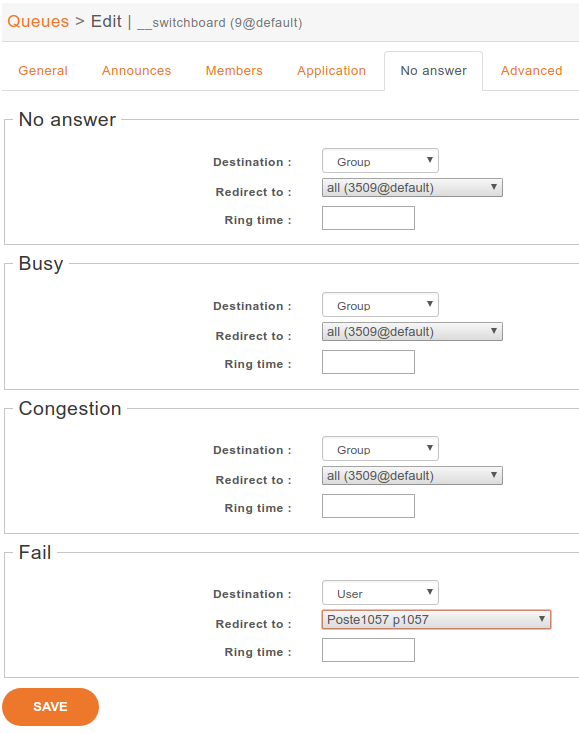
Configure “No Answer” Destinations of the Switchboard Queue
You can configure the switchboard queue to redirect its calls to different destinations when none of its operator are available. The “No Answer” destinations defines where to redirect such calls.
To do so, you need to set the timeout of the Switchboard queue to know when calls will be redirected.
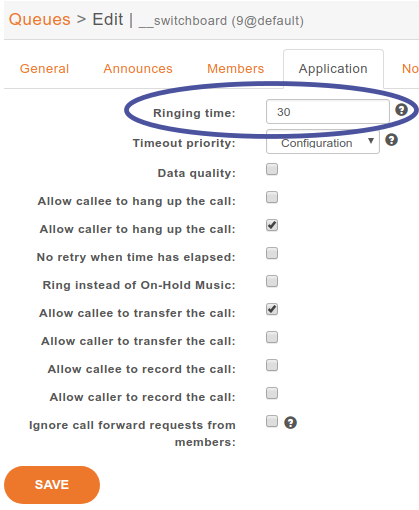
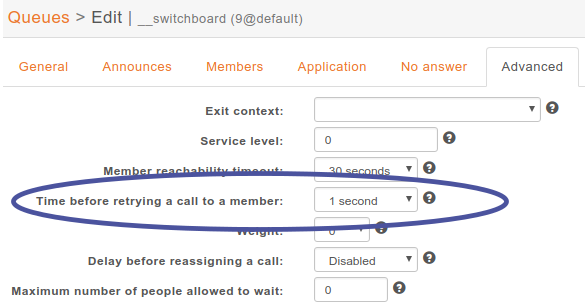
You must change the reachability timeout to not be disabled nor be too short.
The time before retrying a call to a member should be as low as possible (1 second).
In this example we redirect “No Answer”, “Busy” and “Congestion” calls to the everyone group and “Fail” calls to the guardian user.
You can also choose to redirect all the calls to another user or a voice mail.
Statistics
Report
Switchboard report includes the following columns:
date: The date range at which the calls were received
offered: The number of calls to the switchboard for the given date excluding calls when the switchboard was closed (e.g. with a schedule)
answered: The number of calls that have been answered by the operator
transferred: The number of calls that have been answered and then transferred by the switchboard operator to another destination
abandoned: The number of calls that have been abandoned in the switchboard queue or while waiting in the hold queue
diverted: The number of calls that have been forwarded to another destination:
a call reaching a full queue
a call waiting until the max ring time is reached
a call forwarded because of a diversion rule
a call forwarded because of a leave empty condition
waiting time average: The average time spent either in switchboard or hold queue
Usage
Switchboard statistics can be retrieved in PDF format via the web interface in .
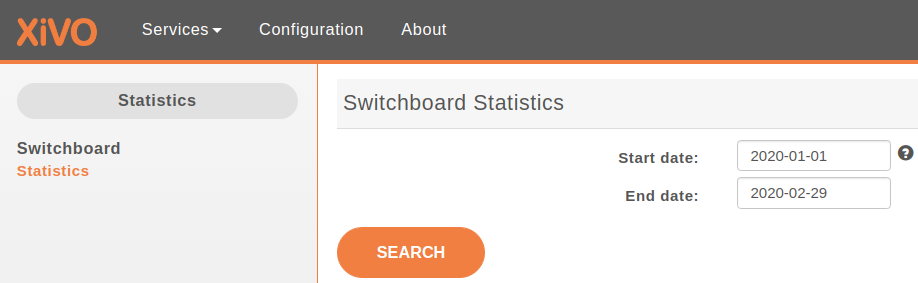
Start date: required field
End date: if empty, the result will contain statistics until the current date
Note
Switchboard statistics older than number of weeks defined by WEEKS_TO_KEEP environment variable in /etc/docker/xivo/custom.env are automatically removed.
Limitations
Incoming calls can only be answered in order of arrival. It means the agent can’t choose which call to answer first, they must answer the first one of the list, then the second, etc…
When operator retrieves a call, it will cancel the current ringing call. Mainly it will cancel the call the the Incoming call queue was sending to him. It therefore puts back the Incoming call in the queue and gives the possibility to the operator to deal with the retrieved call. Note therefore that it will behaves the same for a ringing call on the operator phone which don’t come from the queue: for example if someone inside the company called the operator without going through the queue. In this case the ringing call will be cancelled and lost. This is a limitation. To overcome this you must make sure that people inside the company should join the standard only via the Incoming call queue.